
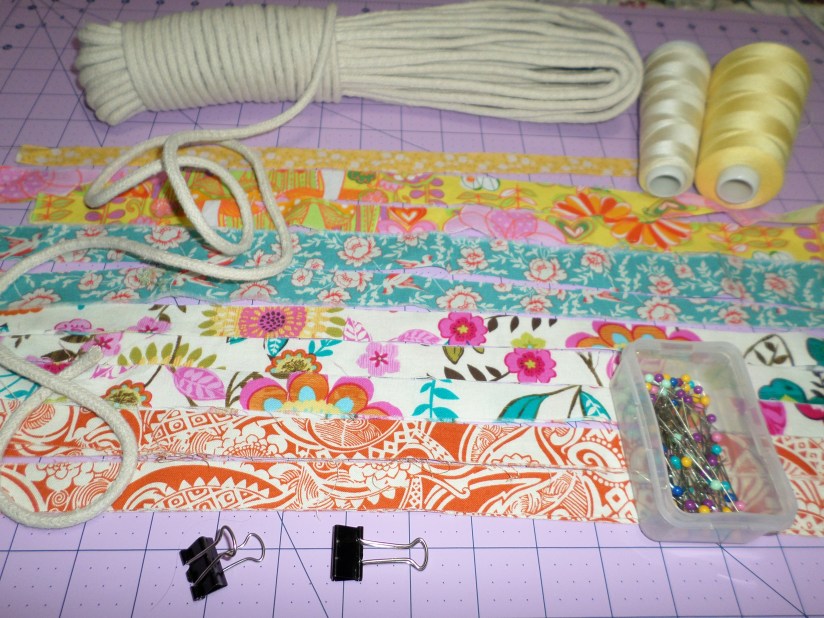
Supplies:
- Cotton clothesline cording
- ¼ yard total of fabric, at least 21 inch lengths
- thread
- fresh sewing machine needle, a universal type is fine
- binder clip
- straight pins
- means of cutting strips of fabric
When selecting fabrics, quilting cottons are easiest, but anything that doesn’t have too much stretch, and is not too prone to fraying when cut into thin strips will work well. When selecting threads, either to match or to contrast with your fabrics, you can use different colors in the bobbin so the inside of the bowl and the outside look different. Cotton or polyester threads are fine.
Steps:
- Cut strips of fabric, about ¾ inch wide and at least 21 inches long; it is ok if they are slightly uneven
- Make sure there is a clean-cut end to the cotton clothesline. Leaving 1 inch at end, start wrapping fabric strip around the cording. Use a 45 degree angle as you wrap. Be sure that the fabric overlaps on each rotation; with practice you’ll find that 1/8-1/4 inch of coverage is good, otherwise there’s unnecessary waste of fabric length and more thickness to sew through. It doesn’t really matter if you wrap clockwise or counter clockwise, you will be doing a lot of wrapping so find the direction that works well for you. Wrap several inches then binder clip the end. PROTIP: roll up fabric strip and slowly unroll as you go around cording, to lessen any fraying edges on fabric.

- Counter-wrap the tip and tuck; spiral-roll the wrapped cording until it is about 1 inch in diameter. Insert the straight pins crosswise to secure the roll. Make sure the ends of the pins stay inbedded in the roll, and don’t poke out the other side. PROTIP: the cording is prone to twisting and tightening up as you wrap, so be sure to untwist and loosen it up as you go.


- Use the zigzag stitch on your sewing machine, making sure the stitch is wide enough to securely connect two cords together. Use a machine foot that can accommodate the width of the stitches (usually the standard foot will do). Also make sure your needle is set to stop in the down position. Starting at the center of your rolled cording, zigzag stitch (slowly so you don’t break the needle on the straight pins) to secure the very center, then slowly rotate the piece as you continue to stitch. Hold the heads of the strait pins to steer the piece. PROTIP: place the spiral so the expansion of the piece is to the outside of machine, which will leave more room to maneuver the bowl base and start working on the sides.


- When the piece is wide enough to rotate with your fingers, you can remove the straight pins, raise the foot and pull the cording to undo the extra loops that have built up. Lower the foot and keep rotating the piece as you sew the two edges of cording together, until you have 2 inches left of the fabric. Look at your stitches to be sure the tension is good.


- Take your next strip of fabric and lay the end under the first strip. Continue wrapping, and sewing as you go, and use the binder clip to hold the fabric in place as you do. Continue sewing and spiraling until the base is the diameter you want.
- If you want it to remain a mat, skip ahead to see how you finish the edge. If you want to create a bowl, tilt the base up at an angle (45 -90 degree angle, depending on how sudden of a curve you want) and keep it tilted at that angle while you sew around the base. (It is helpful to mark the start of where you start sewing at a tilt, so you’ll be able to keep track of how many full rows you create up the sides of the bowl. In the photo, you can see a contrasting piece of thread is an easy way to mark this.) Within a few rotations of sewing around the base, and forcibly tilting the base while you sew, you will have created the curve for you bowl and will now be building up the sides of your bowl . So do NOT keep tilting the base, because you want the sides of the bowl to level out as you sew-in-the-round.


- When your bowl gets to the height you like, be sure you have sewn the full circumference of your last row (remember that contrasting thread we used to mark the start). Cut the cording at a very severe angle and be sure you have about 3 inches of fabric strip left to finish off the end. Wrap the fabric around the end of the cording, and pin it to the edge of the bowl. You want this to blend as evenly as possible so the edge has a ‘smooth’ finish. Now continue sewing past the end of the wrapped cording, making sure that zigzag stitch helps compress the remains of that fabric strip to the edge of the bowl. When you remove the bowl from the machine, leave extra thread in case you want to even out the tapering. (NOTE: these edge-finishing photos show how the bowl looks when I added a lip, and those instructions are below. Please note the extreme angle to cut the cording.)


If you want a clean-edged bowl, you are done! Just do minor trimming and tie off the thread ends.
A few variations: leaving openings near the edge so you can weave ribbon into the bowl, or adding a lip to your bowl.
- To create openings near the edge, when your bowl is only 2 or 3 rows away from the finished height that you want, remove it from the sewing machine. Using straight pins, mark around the circumference of the bowl where you want the openings to be. Try to keep the openings evenly spaced. NOTE: I’ve placed pins on a bowl that is already completely finished. I just wanted you to see how the pins would look on the edging when you’re adding openings to your bowl.

- Return your bowl to the sewing machine and continue to zigzag stitch until you come to the first marked opening. Switch to a normal straight stitch, and sew through either the right or left side row of cording, and just for the length of what you want the opening to be. Now switch back to the zigzag stitch until you reach the start of the next opening you want to create. Keep sewing like this until you’ve finished the row, then go back to sewing-in-the-round with just the zigzag stitch for a few more rows until you have the height you want on the bowl.
- To add a lip to your bowl, remove the bowl from the sewing machine. Rest the bowl on its top rim, and so it’s to the right-hand side of the sewing needle, and reorient where you left off with the sewing needle.
- Slightly compress the side of the bowl as you start sewing-in-the-round. Do this for about two rows, until the curve of the lip is created. Sew-in-the-round on the now flat plane of the lip, until the lip is the width that you want.


- Finish the edging as noted above, for a plain-edged bowl.

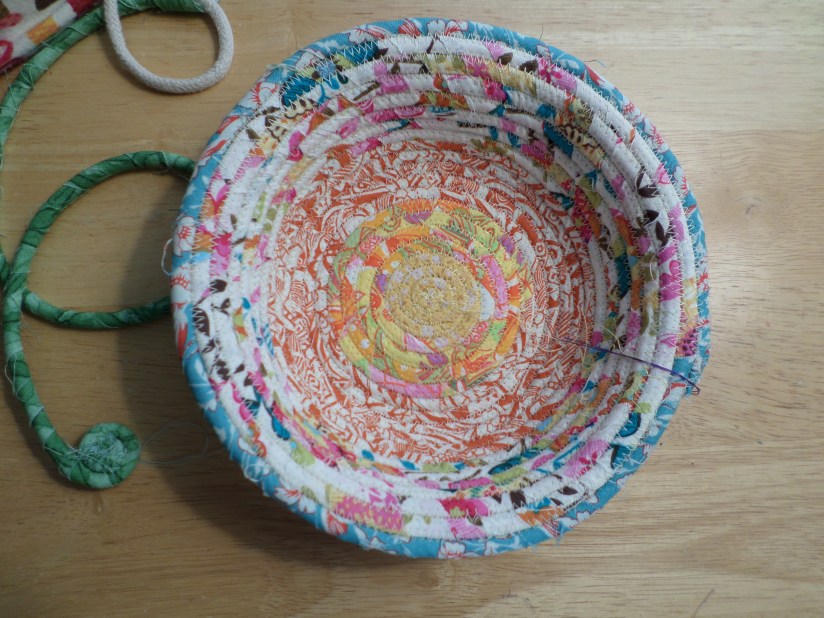
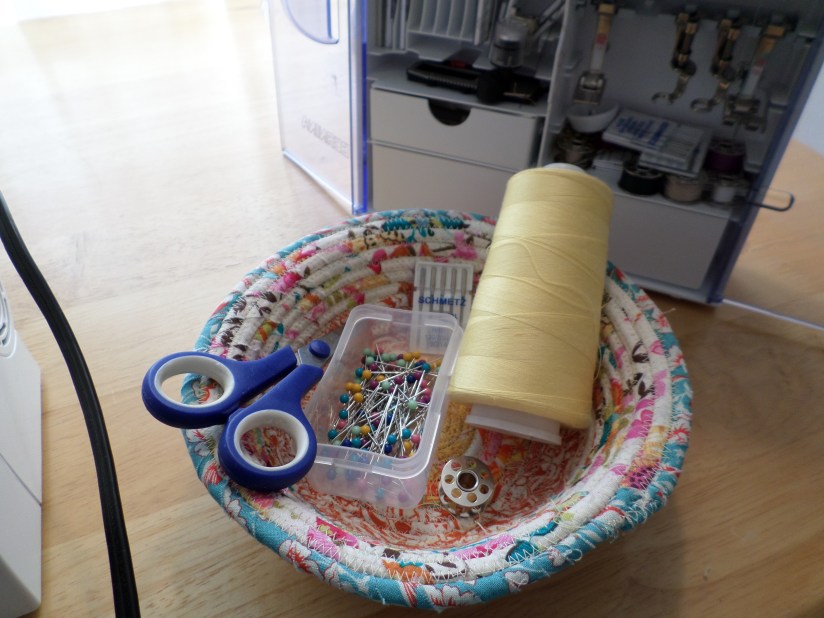
Now I have a perfect and lovely means of keeping my sewing area clean……
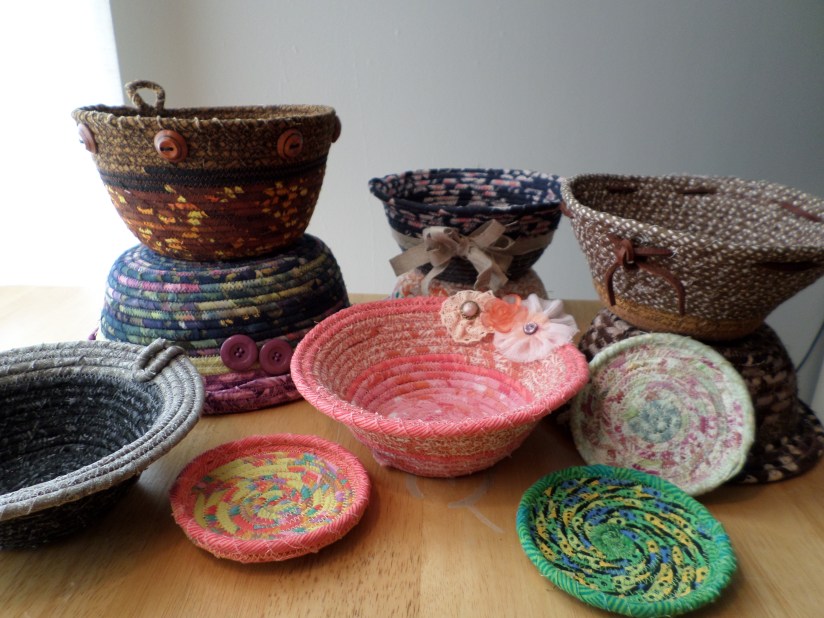
You can add buttons, ribbon trims around the outside, weave trims through your bowl, or add embellishments. When you enter the vortex, everything is possible!


