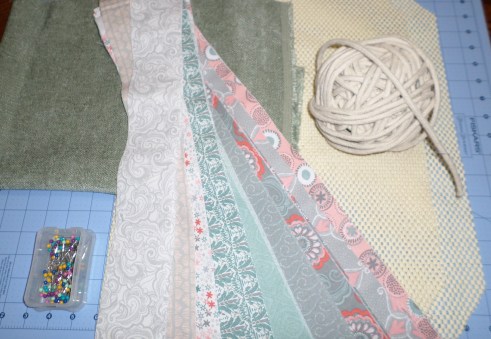
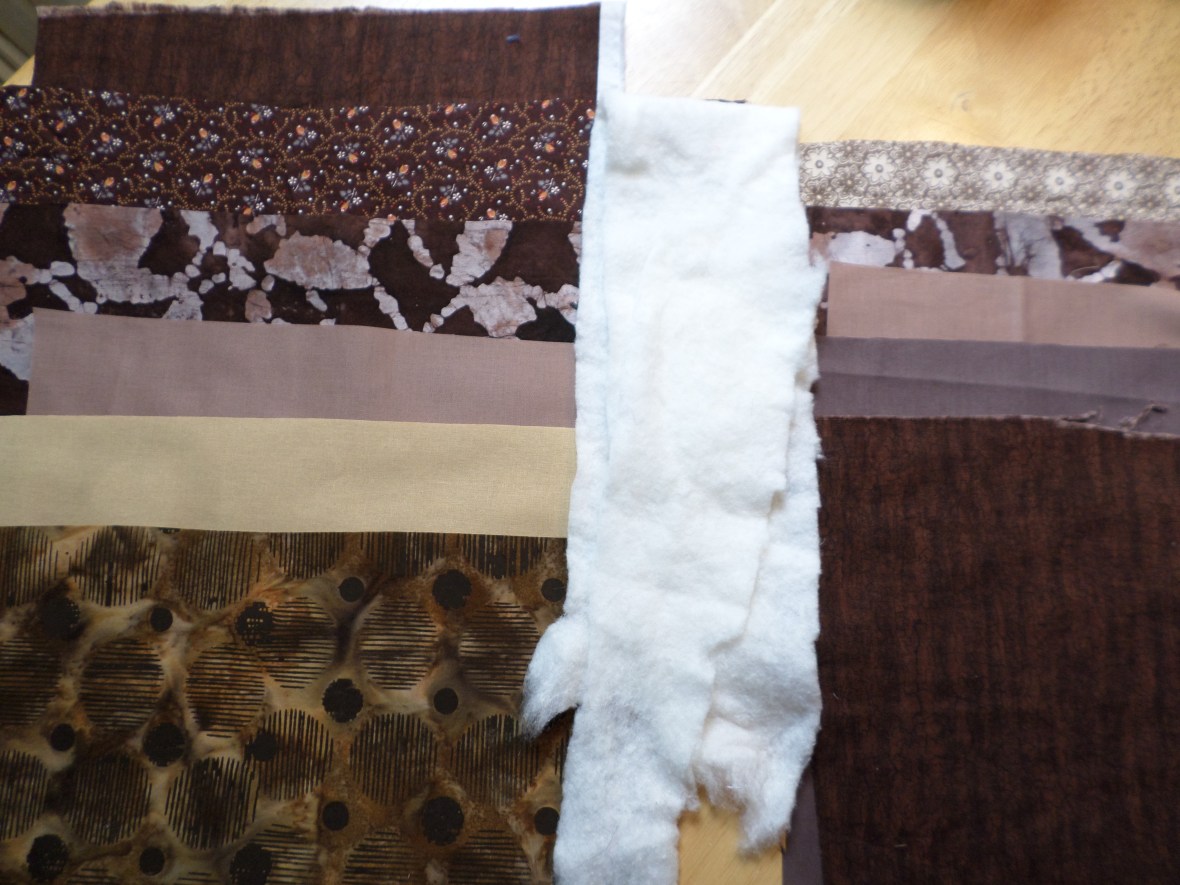
Layered Fabric Fossil Fern Quilt

Supplies:

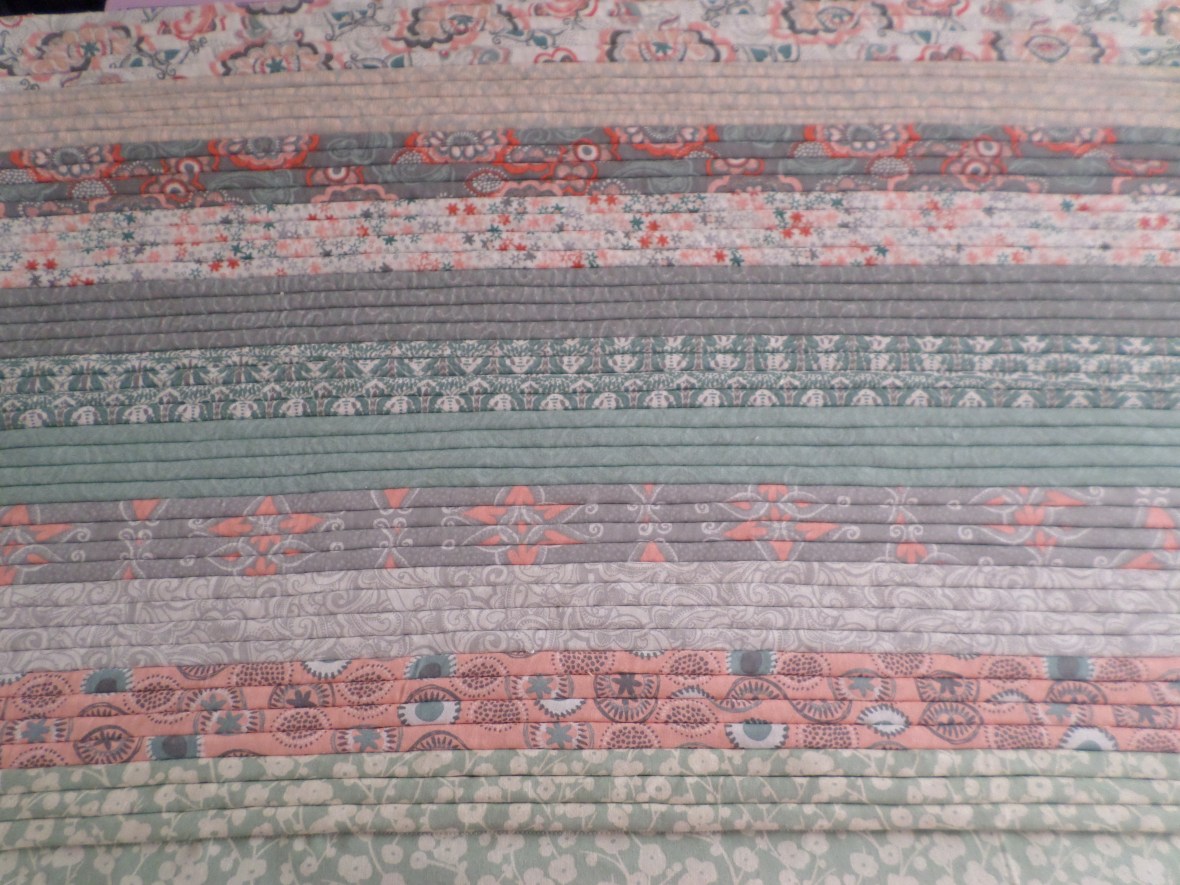
  • 4 or more pieces of fabric, each around 9″ by 12″
  • low-loft batting
  • sharp-pointed scissors for detail cutting fabric
  • a sewing machine and foot that are for free-hand motion quilting
  • sewing notions: thread, pins, seam ripper, sewing needle
  • beads
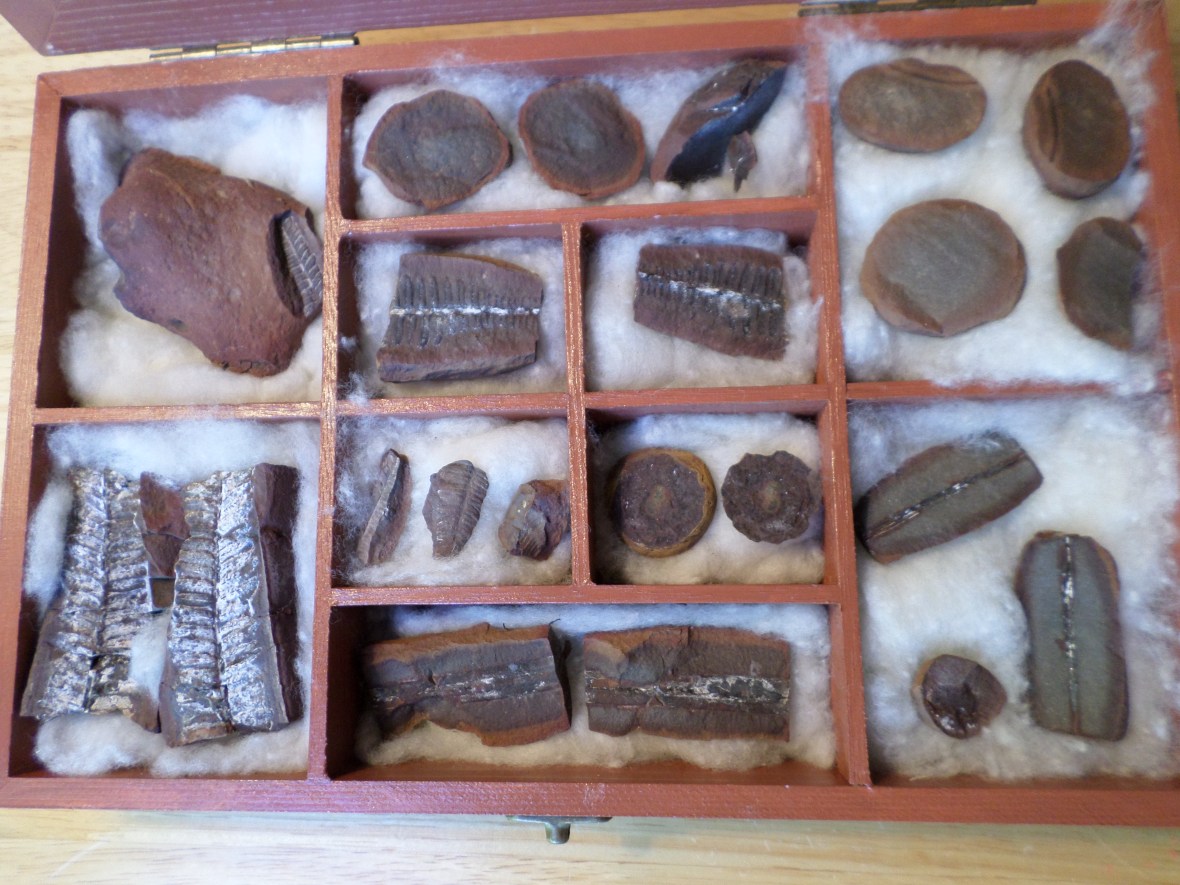
  • fossil samples or photos for inspiration

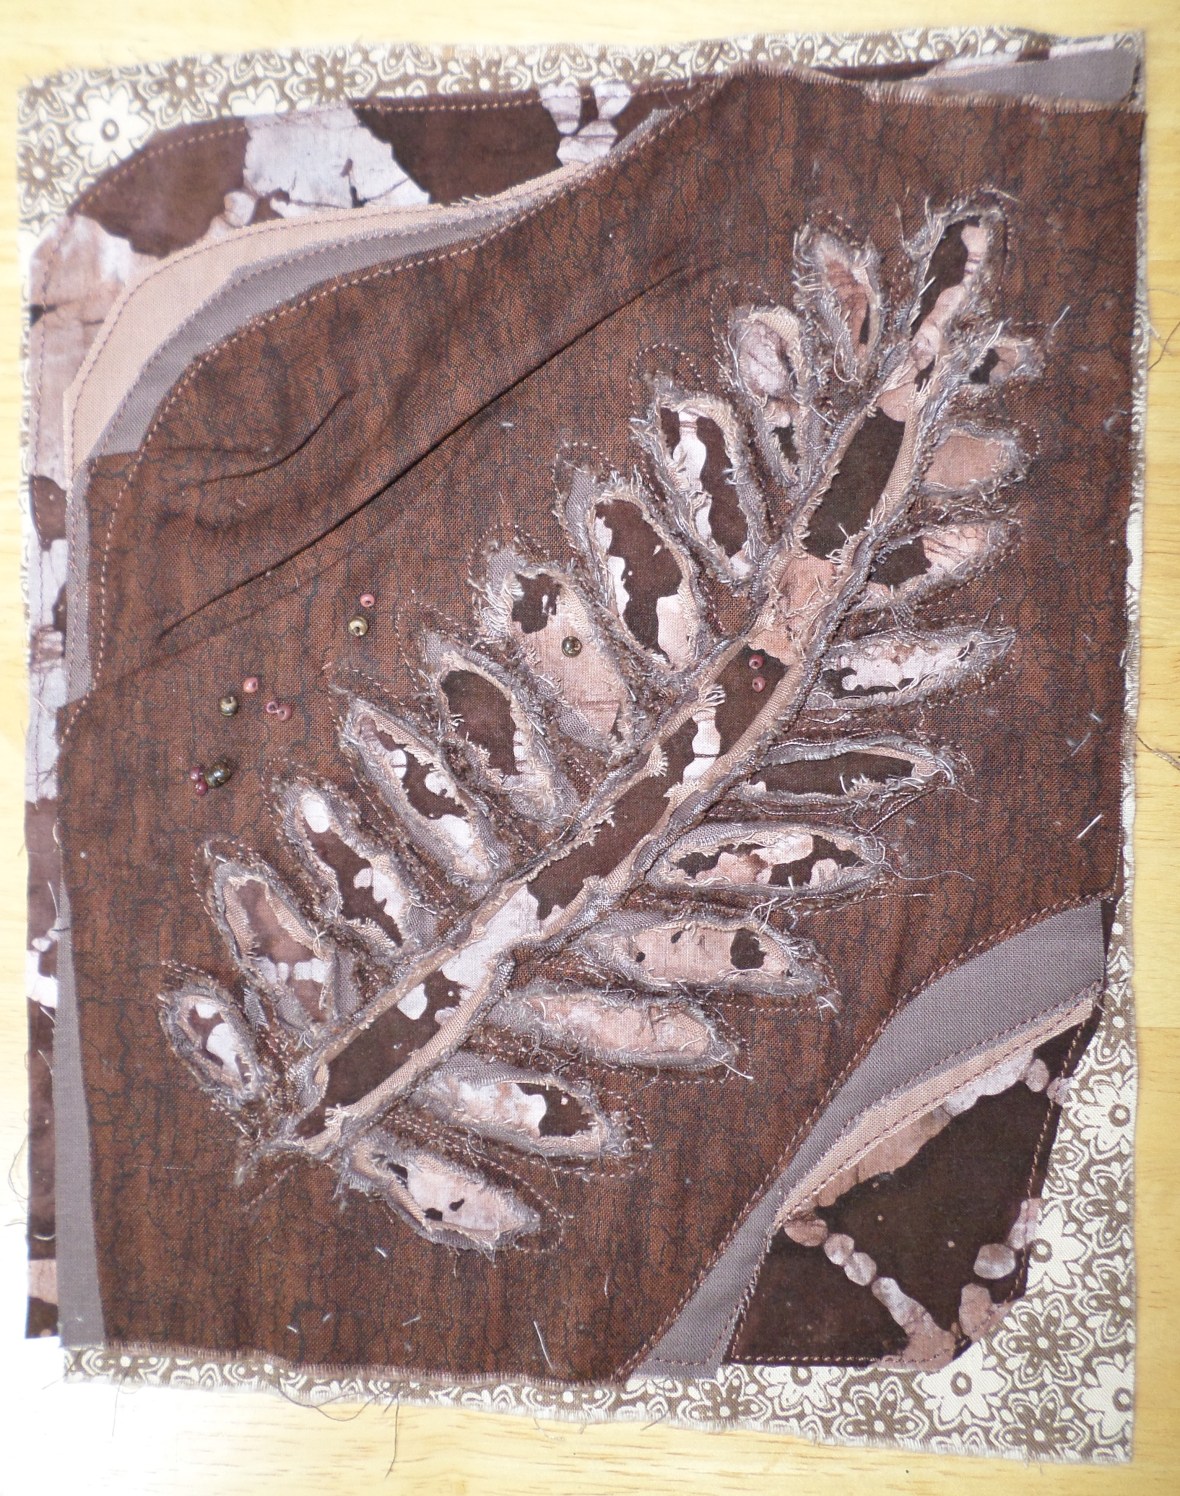
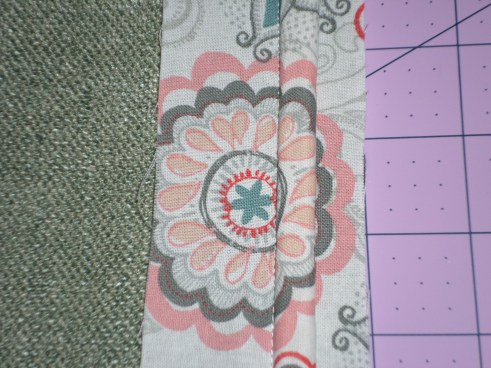
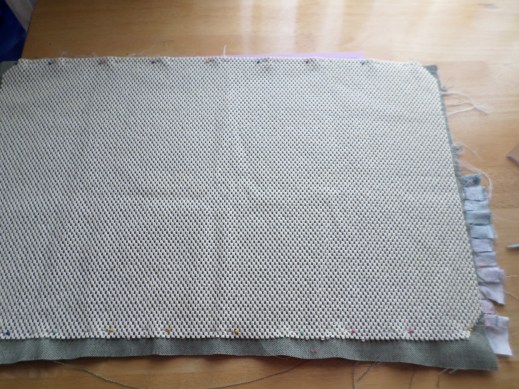
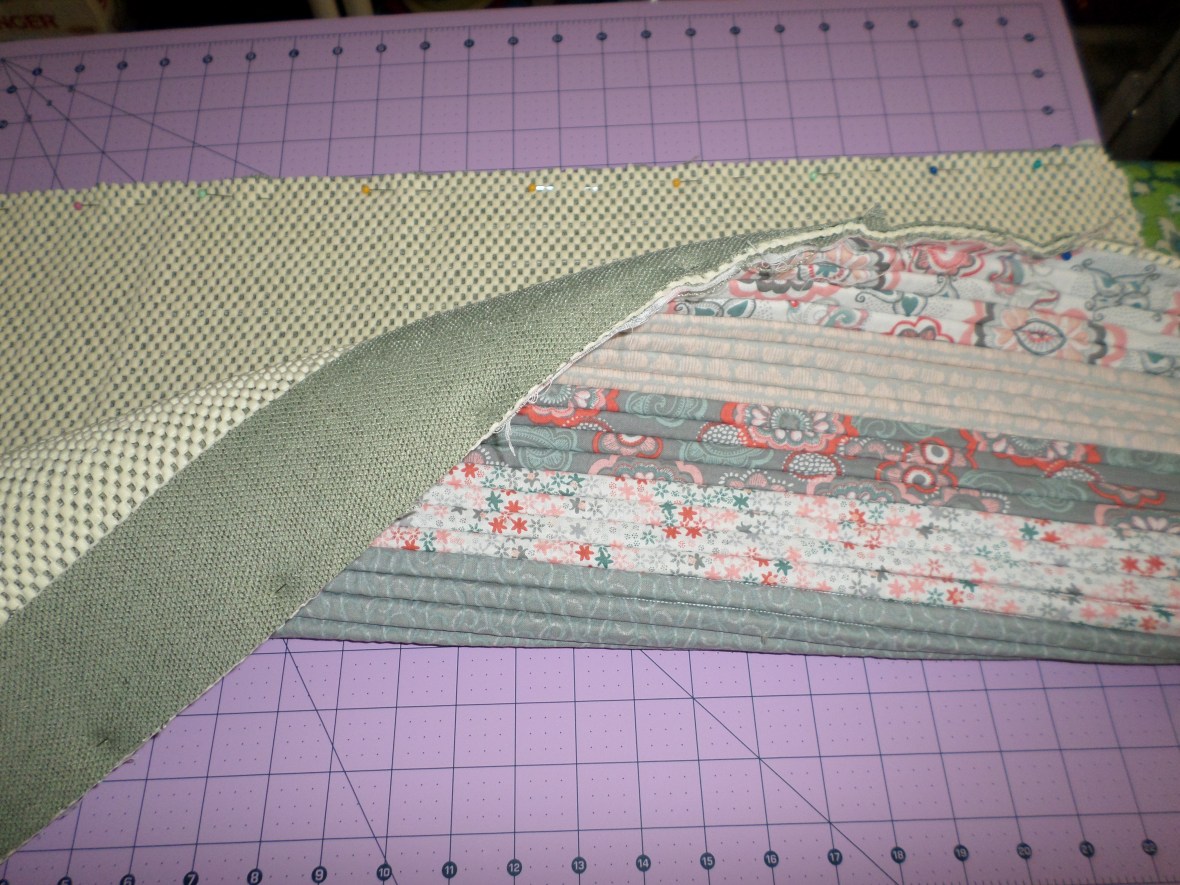
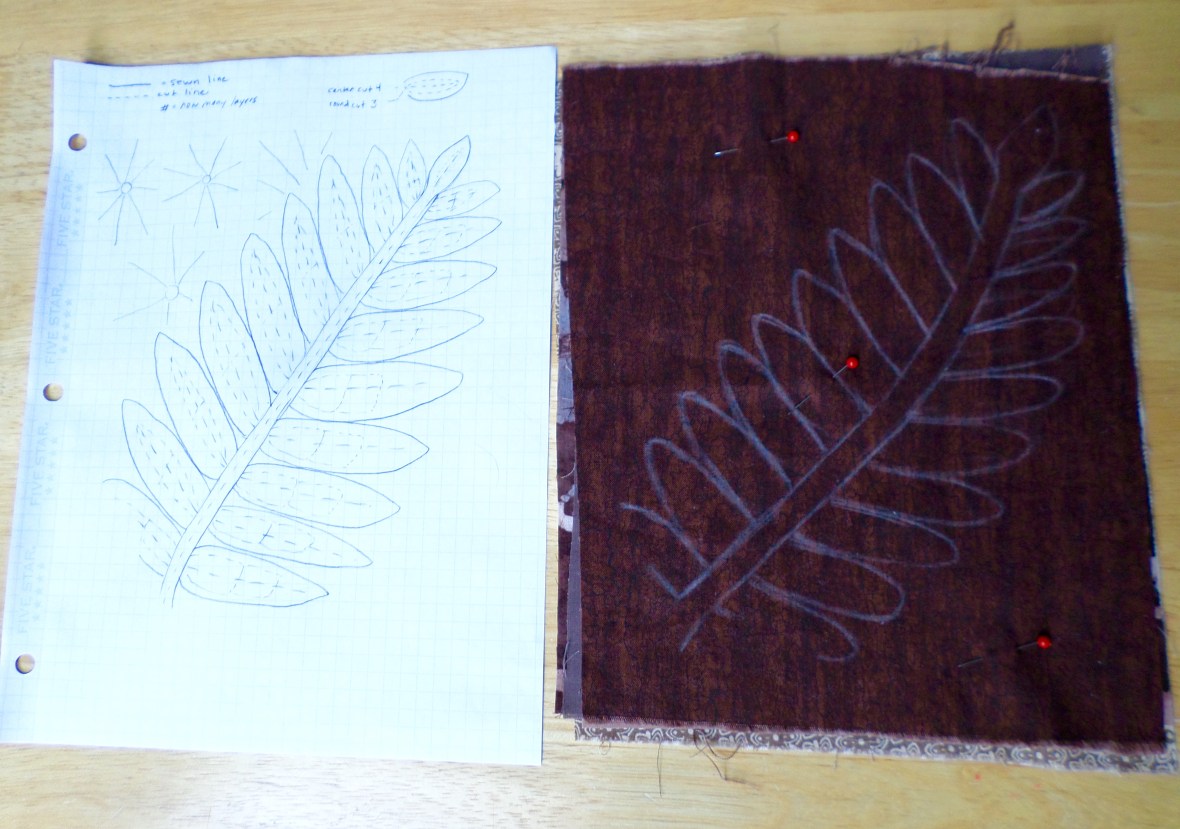
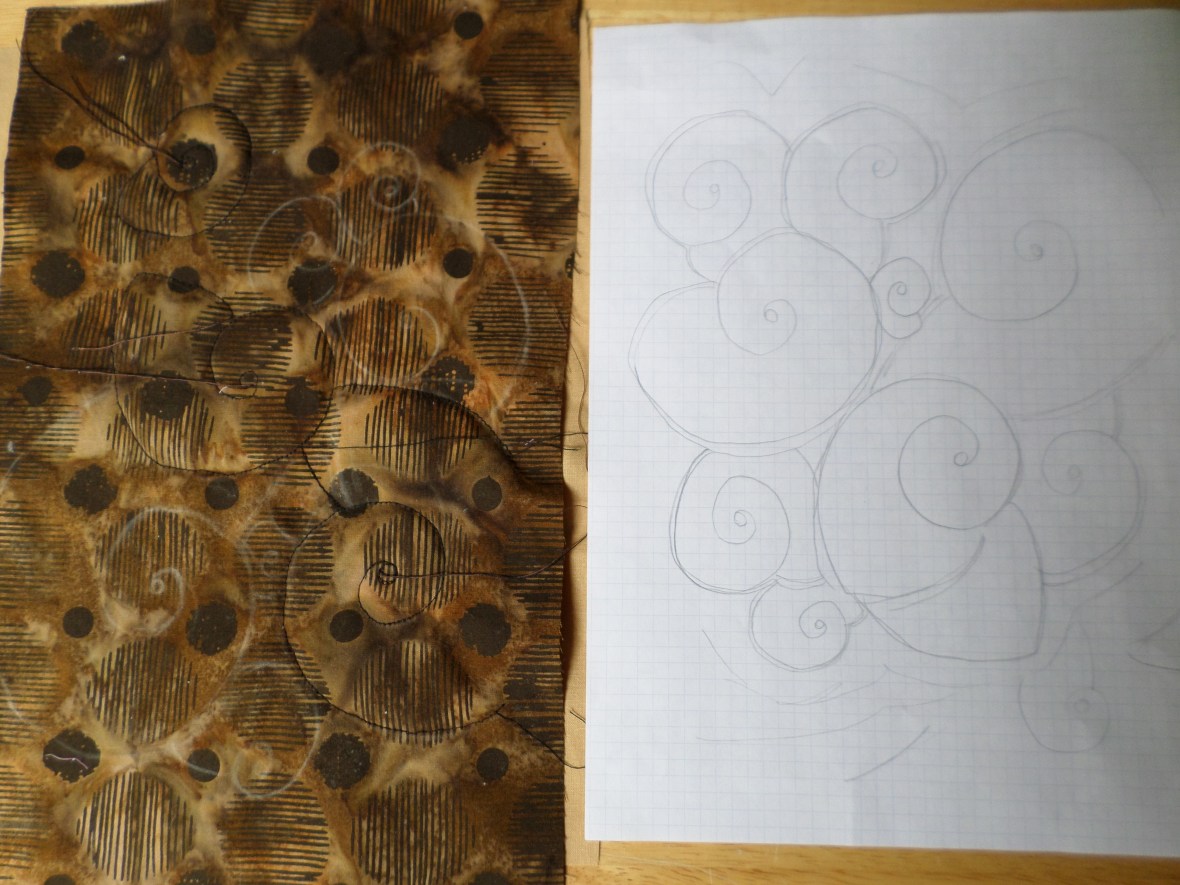
Following the premise set in the book “Layered Cloth: The Art of Fabric Manipulation,” by Ann Small, I selected several fabrics that had a fossilish look, as well as solid colors, and stacked them with a layer of batting between the bottom and next-to-bottom layers.  I pinned the layers and used chalk to draw my fern design onto the top layer of fabric.  It was important to sketch this out first, as I needed to figure how the fern impression would be created with sewn lines, and cut out areas.  I had to plan how many layers I would cut through for each of the leaves and stem.

SAMSUNG CAMERA PICTURES

SAMSUNG CAMERA PICTURES

SAMSUNG CAMERA PICTURES

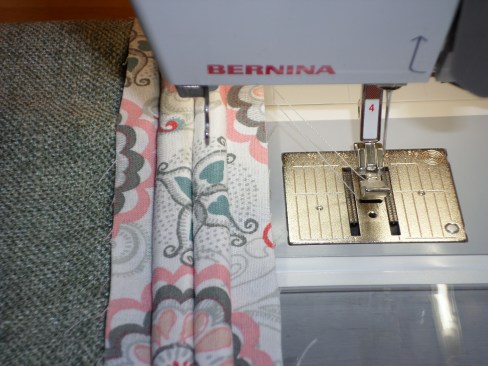
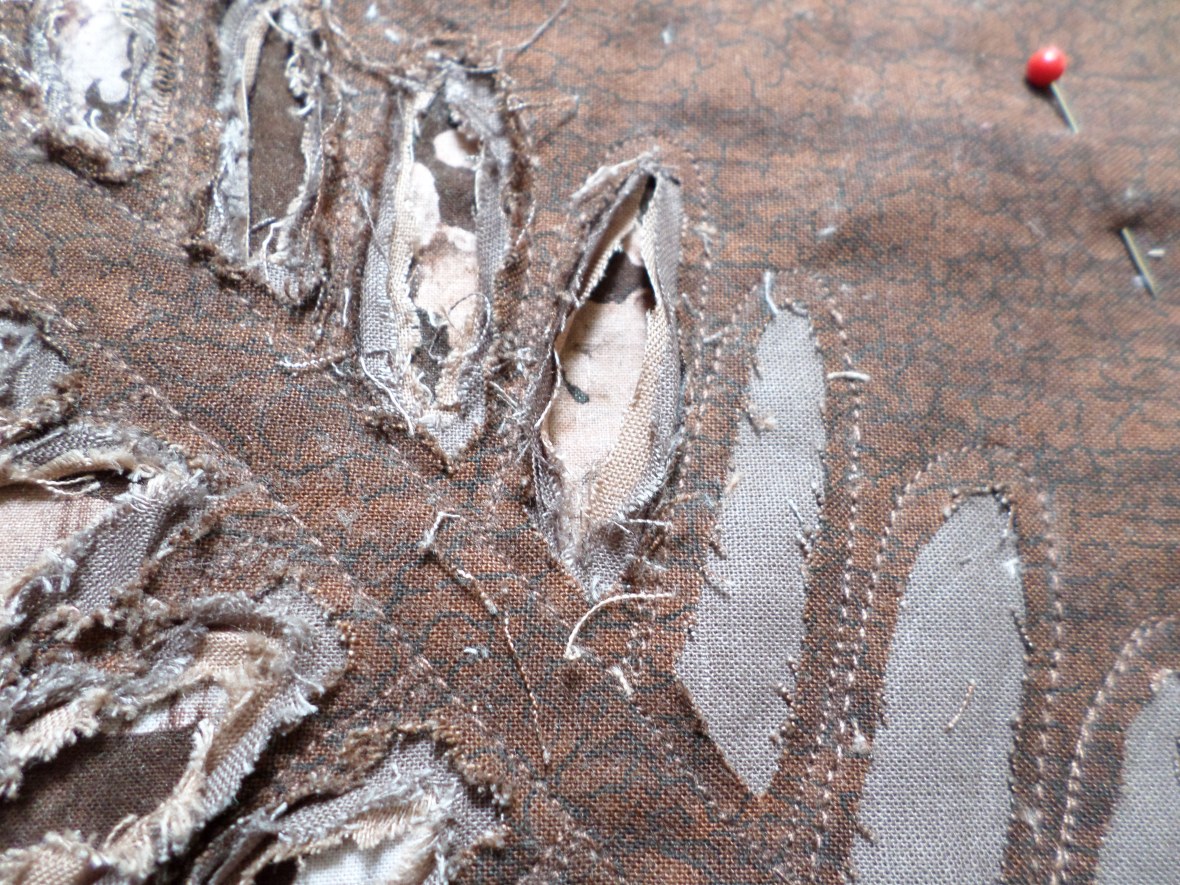
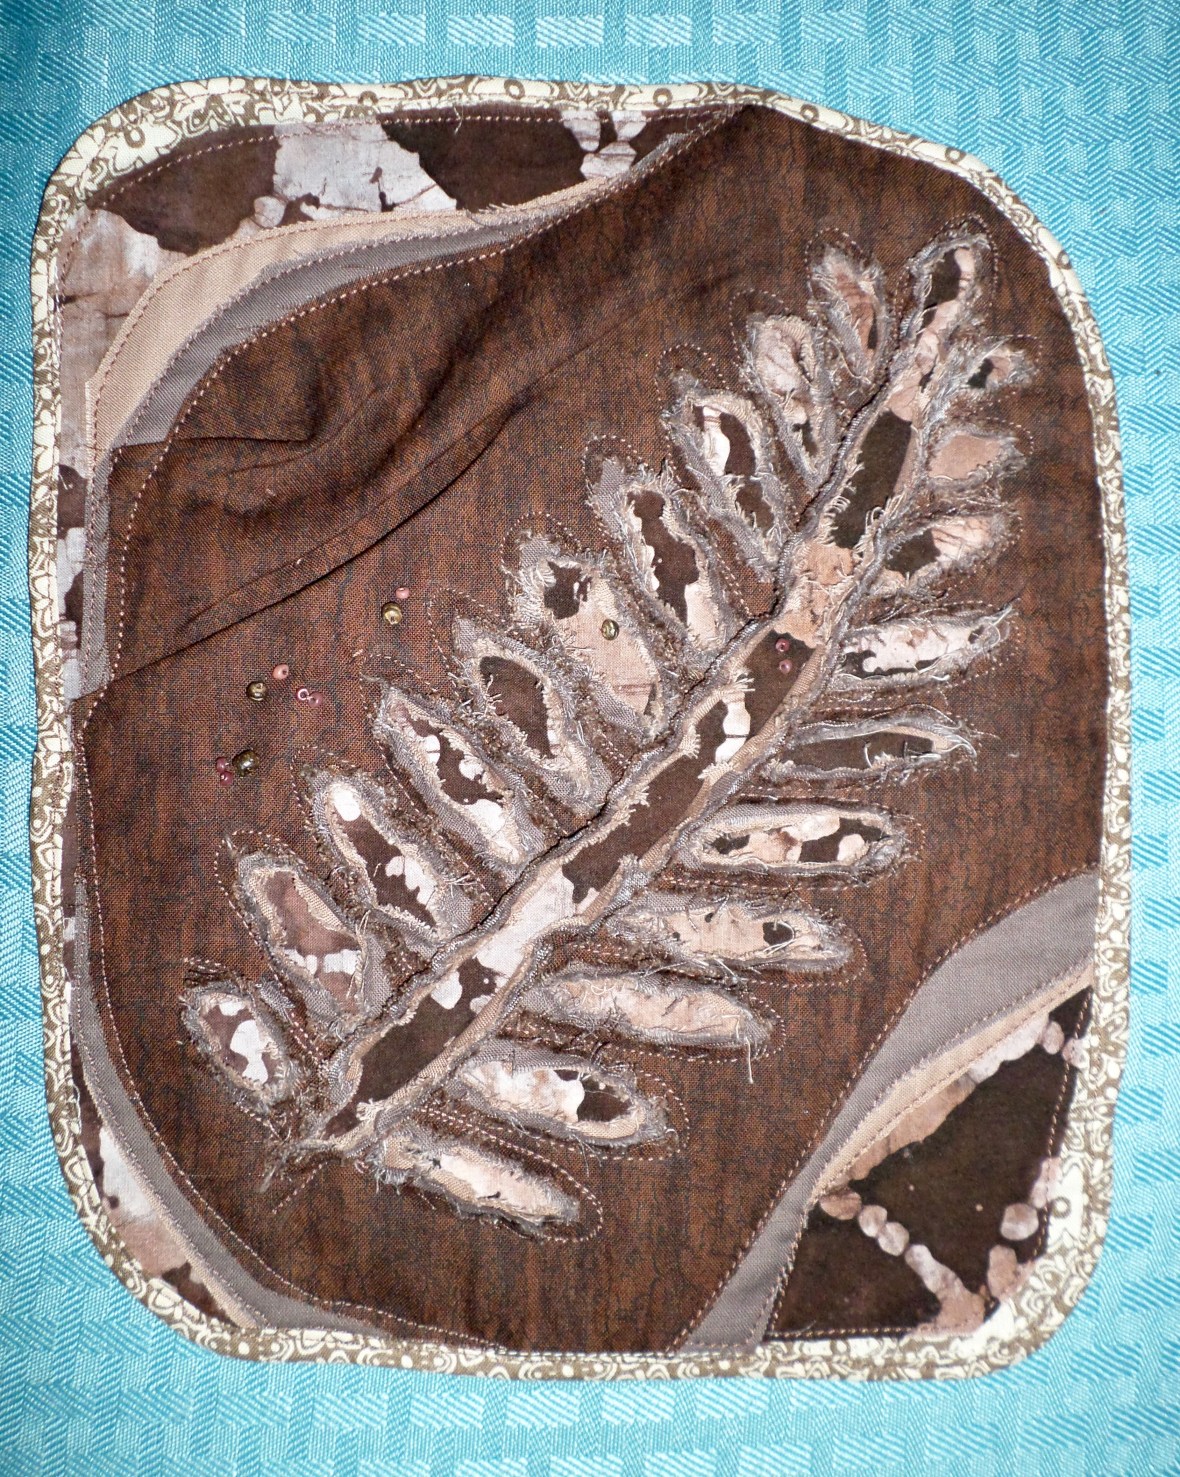
After free-motion sewing the fern outline, I wiped off the chalk residue.  The next task was to start cutting away the layers.  This can be a challenge because pointy scissors are apt to pierce through too many layers.  So I used a pin to catch and lift up just the top layer of fabric, then I inserted the seam ripper to make a small hole.  Now I could start carefully cutting with the pointy scissors.  I cut the top fabric away for each leaf blade, about 1/8th inch away from the stitch line.

SAMSUNG CAMERA PICTURES

SAMSUNG CAMERA PICTURES

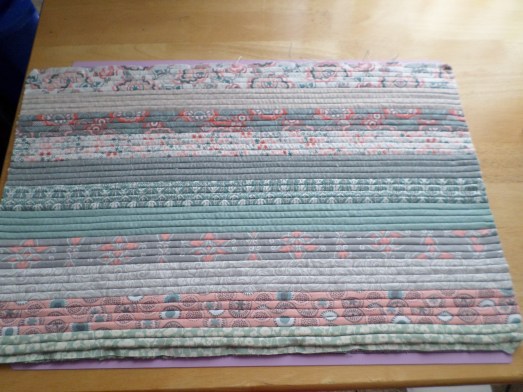
Next I cut away two solid colored layers of fabric, slightly smaller that the top layer cut out.  This revealed a textured batik layer of fabric, which becomes the main fabric for the blades.  I now used my thumbnail and scraped the raw cut edges around each blade; this helped open the blades and tuft the cut edges so they would stand up.  After finishing the blades, I cut along the center of the stem, through three layers to reveal the batik fabric.  I roughed up the raw edges, and trimmed random threads overall to even things out.  I tried to iron the openings, but that didn’t seem to accomplish much.  My fern was complete, so I played with the finishing touches.

SAMSUNG CAMERA PICTURES

SAMSUNG CAMERA PICTURES

SAMSUNG CAMERA PICTURES

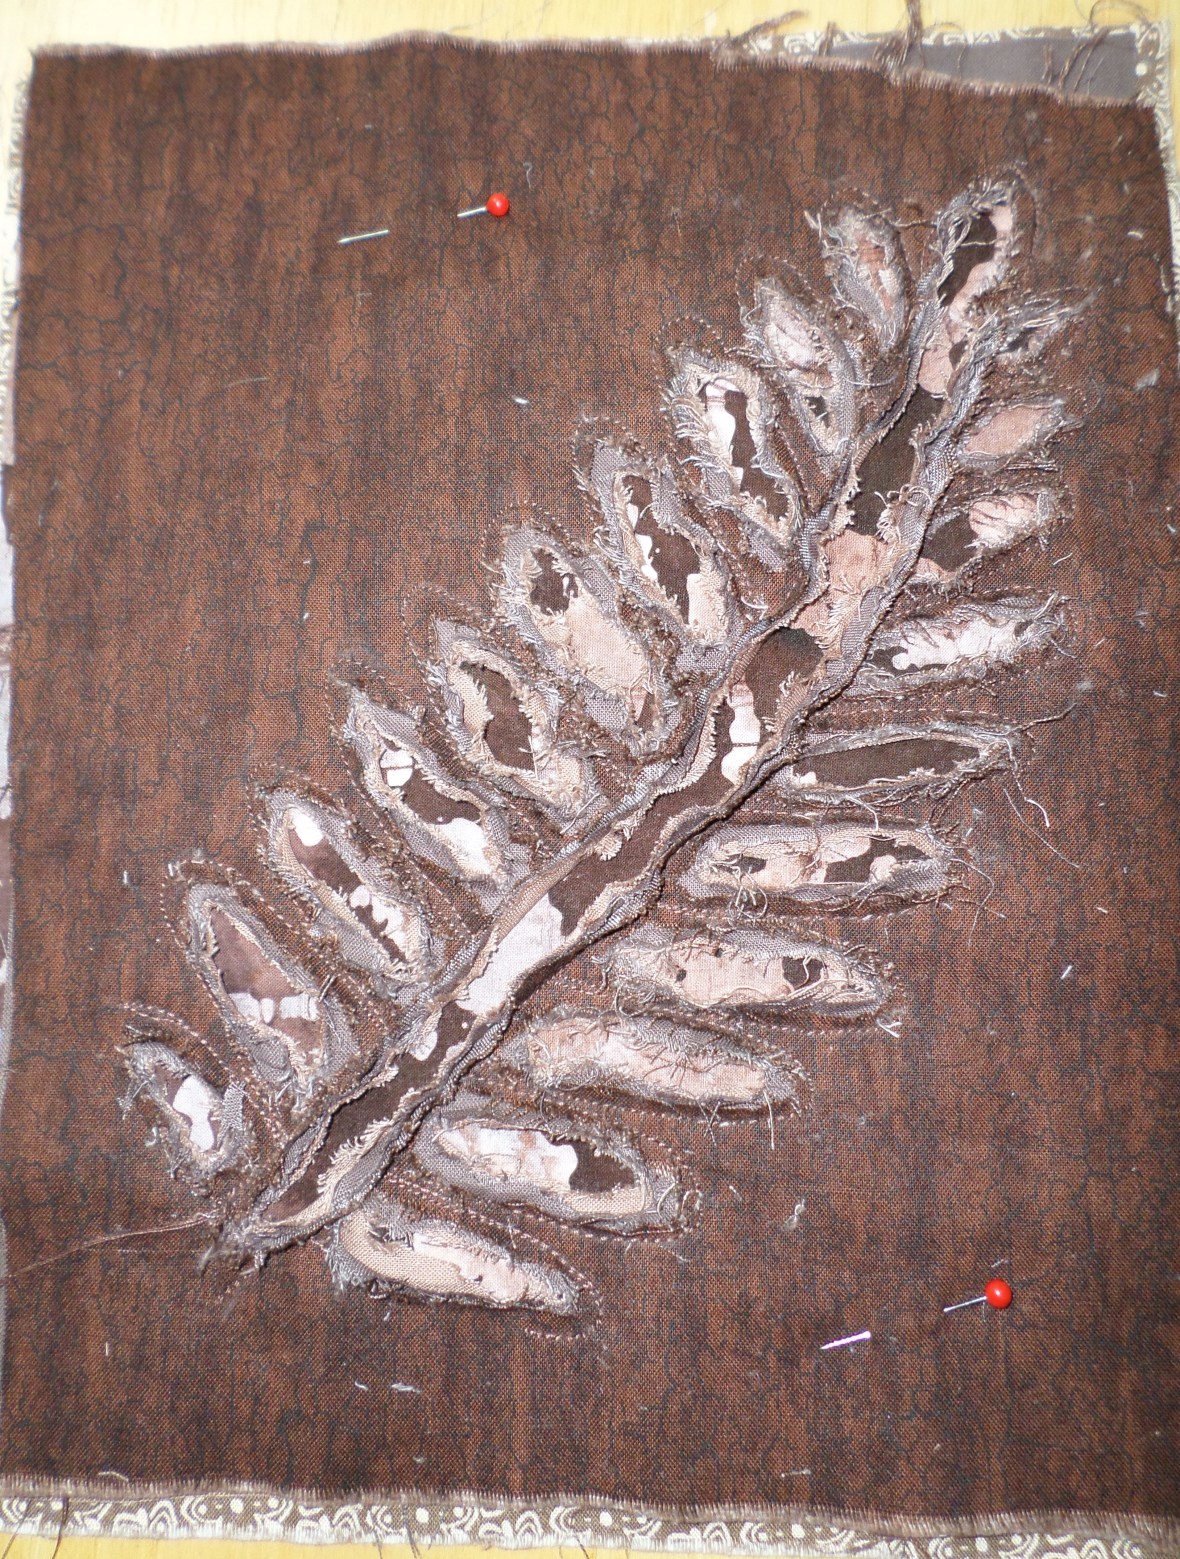
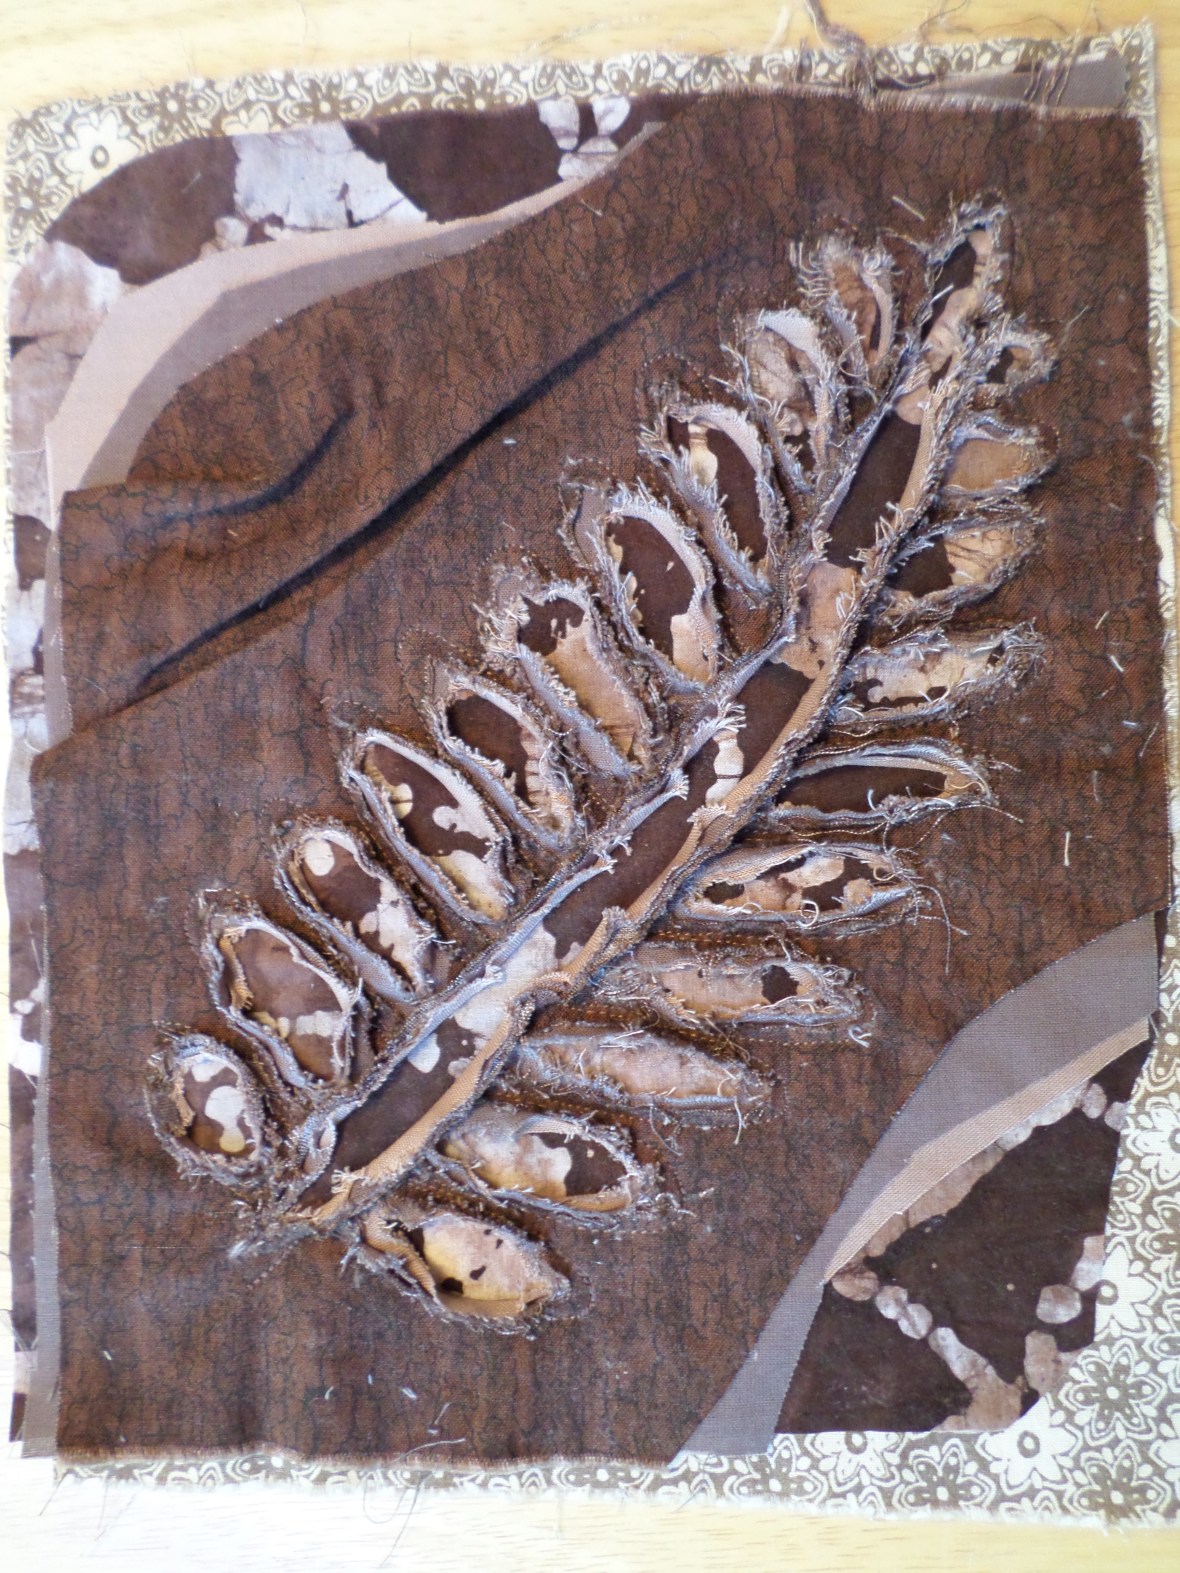
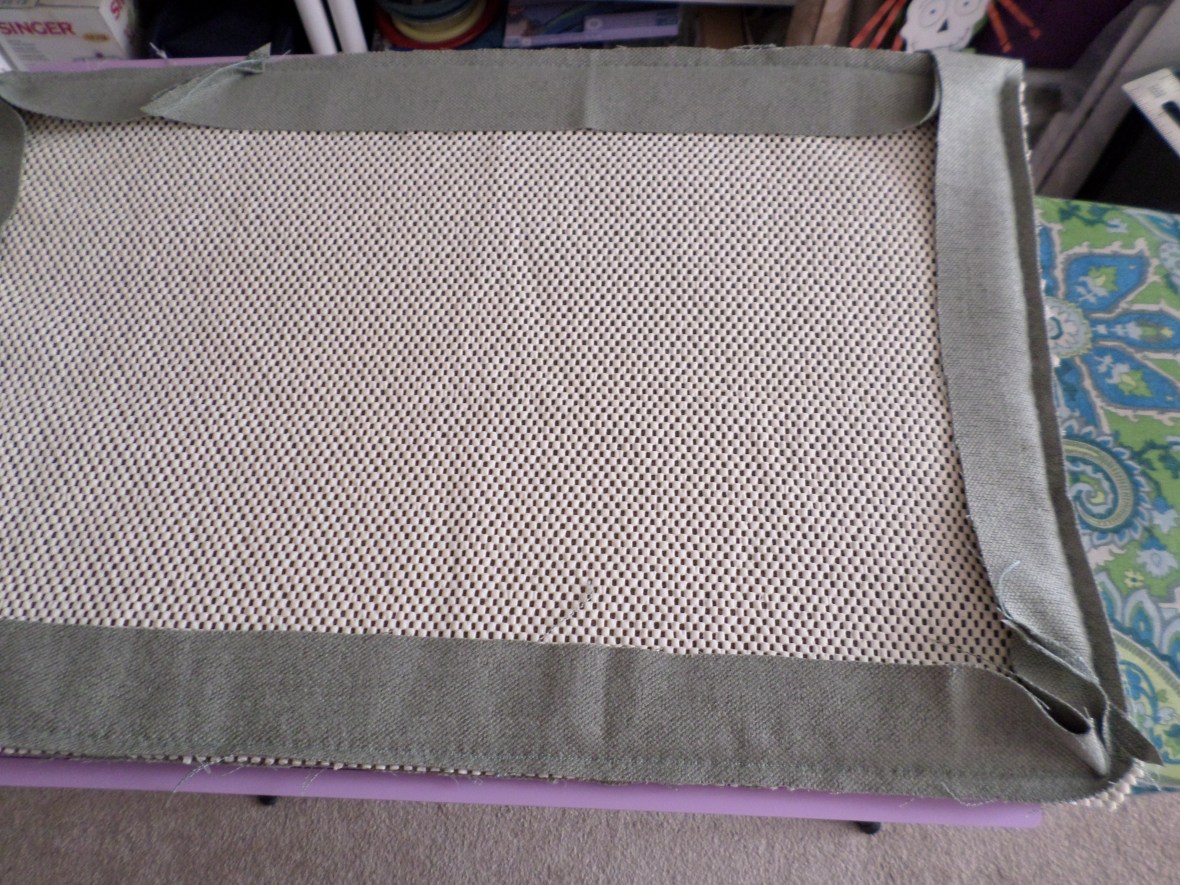
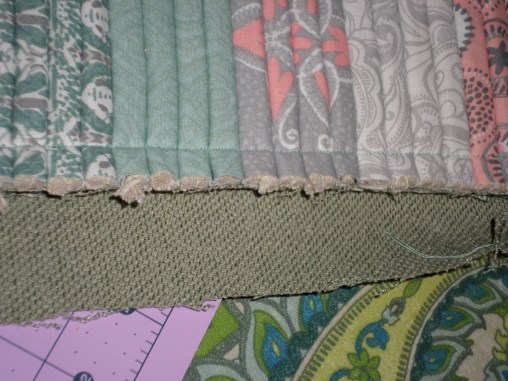
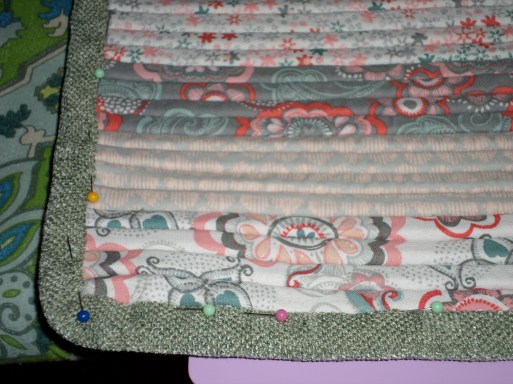
With thread, I tacked down a few spots of the top layer fabric to give it extra texture and creasing like a fossil rock may have.  Then I trimmed back the layers of fabric, tiering them so each could be seen, and I stitched down their edges.  I started adding beads, a few looked fine but I felt too many would be a distraction.  That may change over time, but for now I like just a few.  I used packaging tape to remove the last little bits of thread. My final touch was a thin binding.

SAMSUNG CAMERA PICTURES

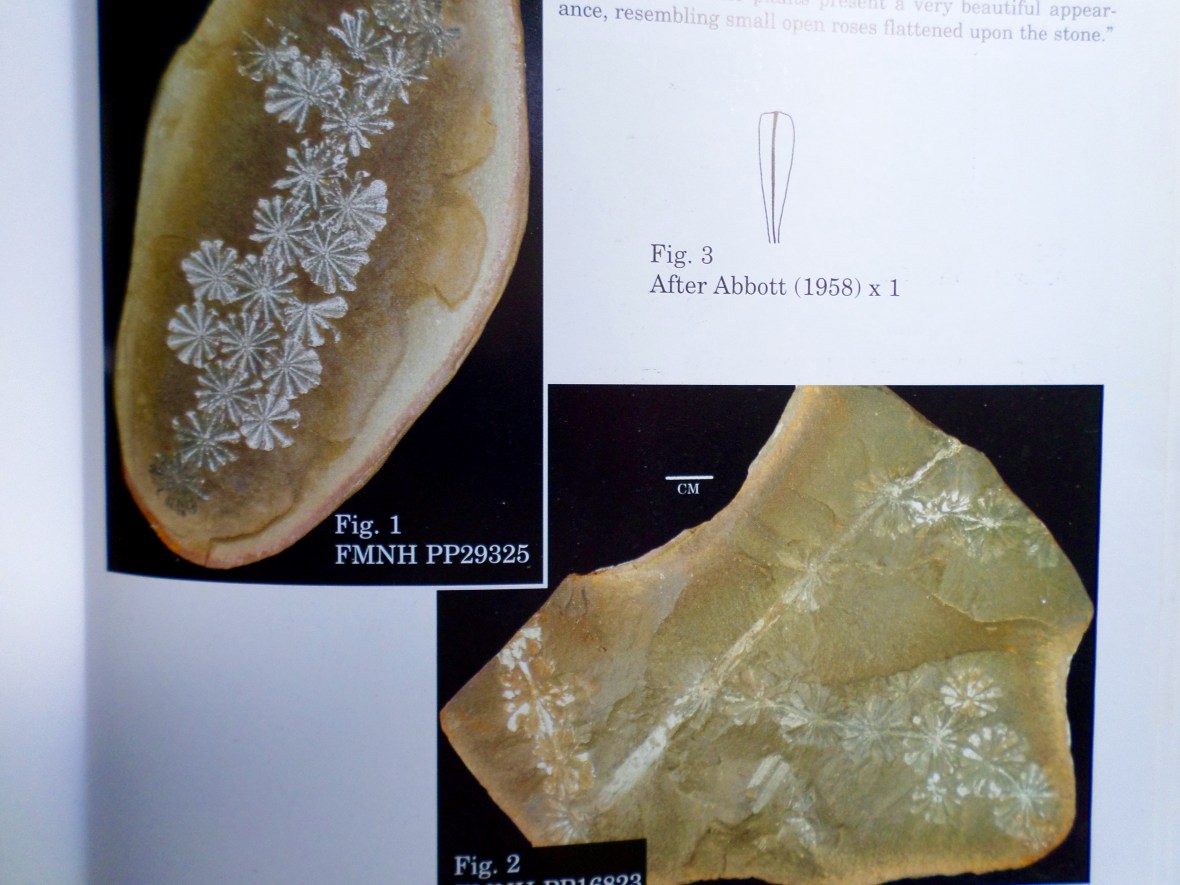
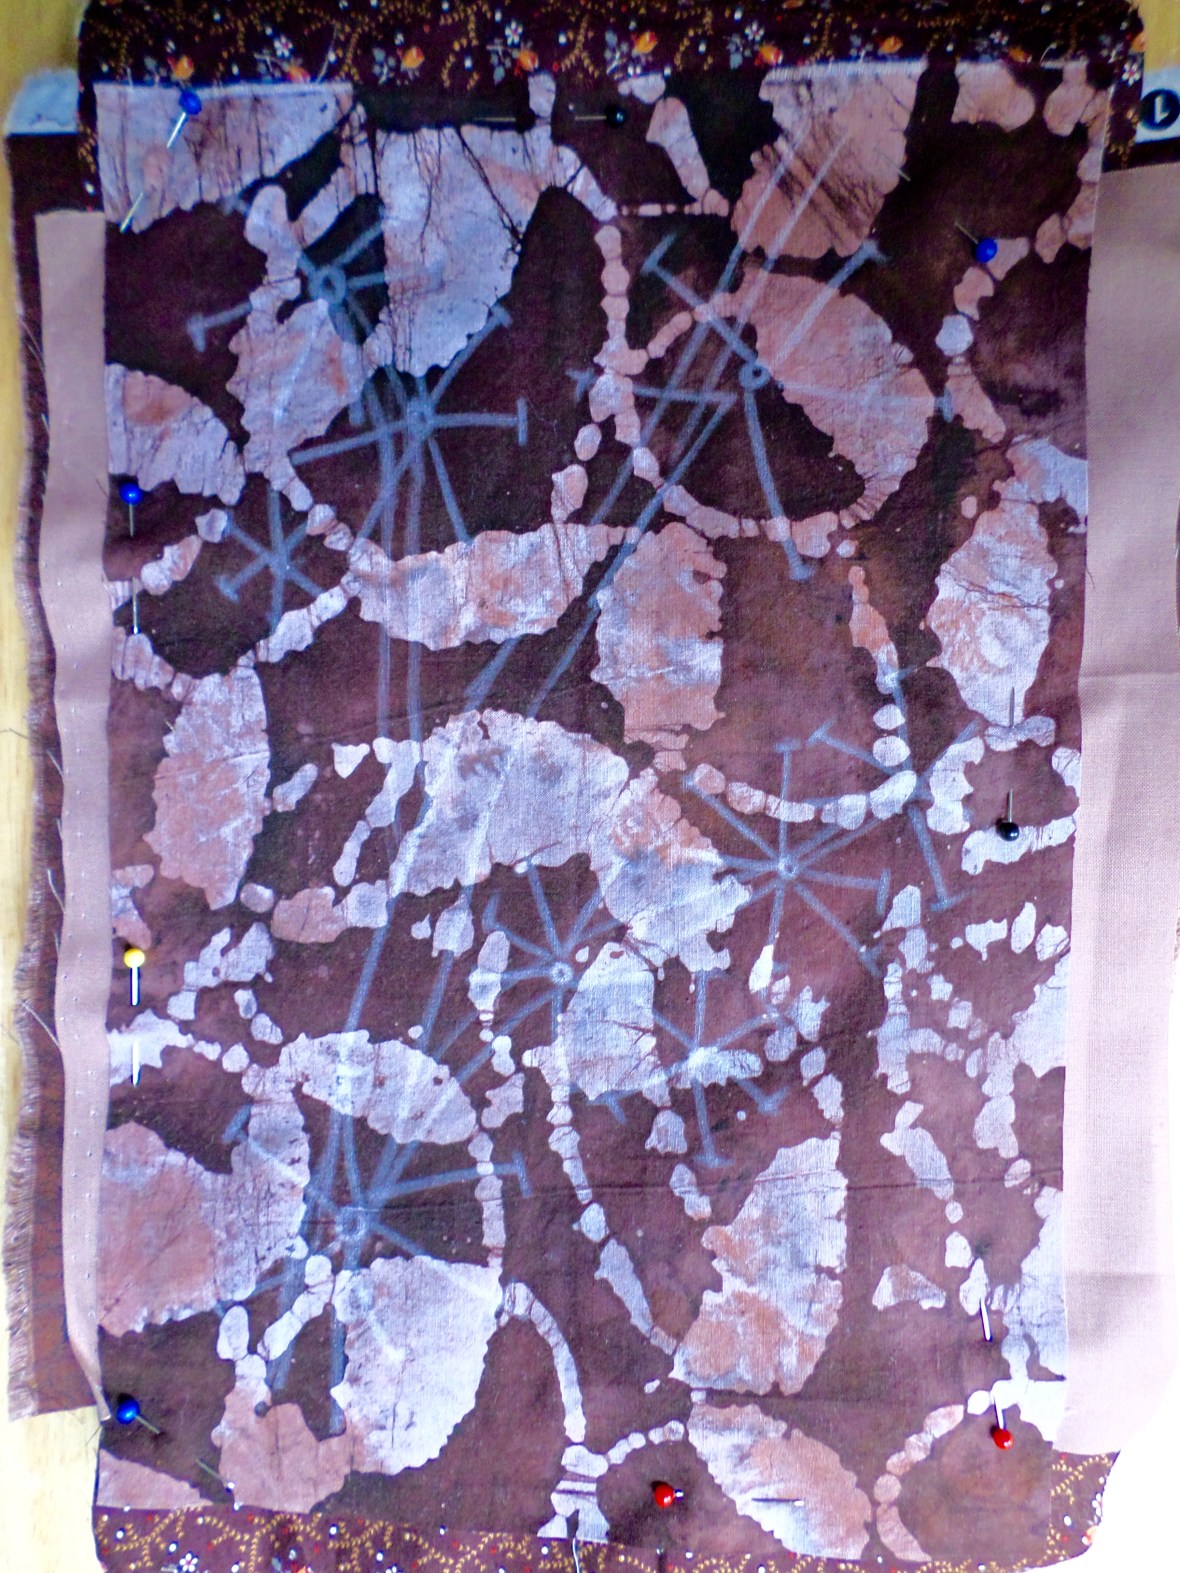
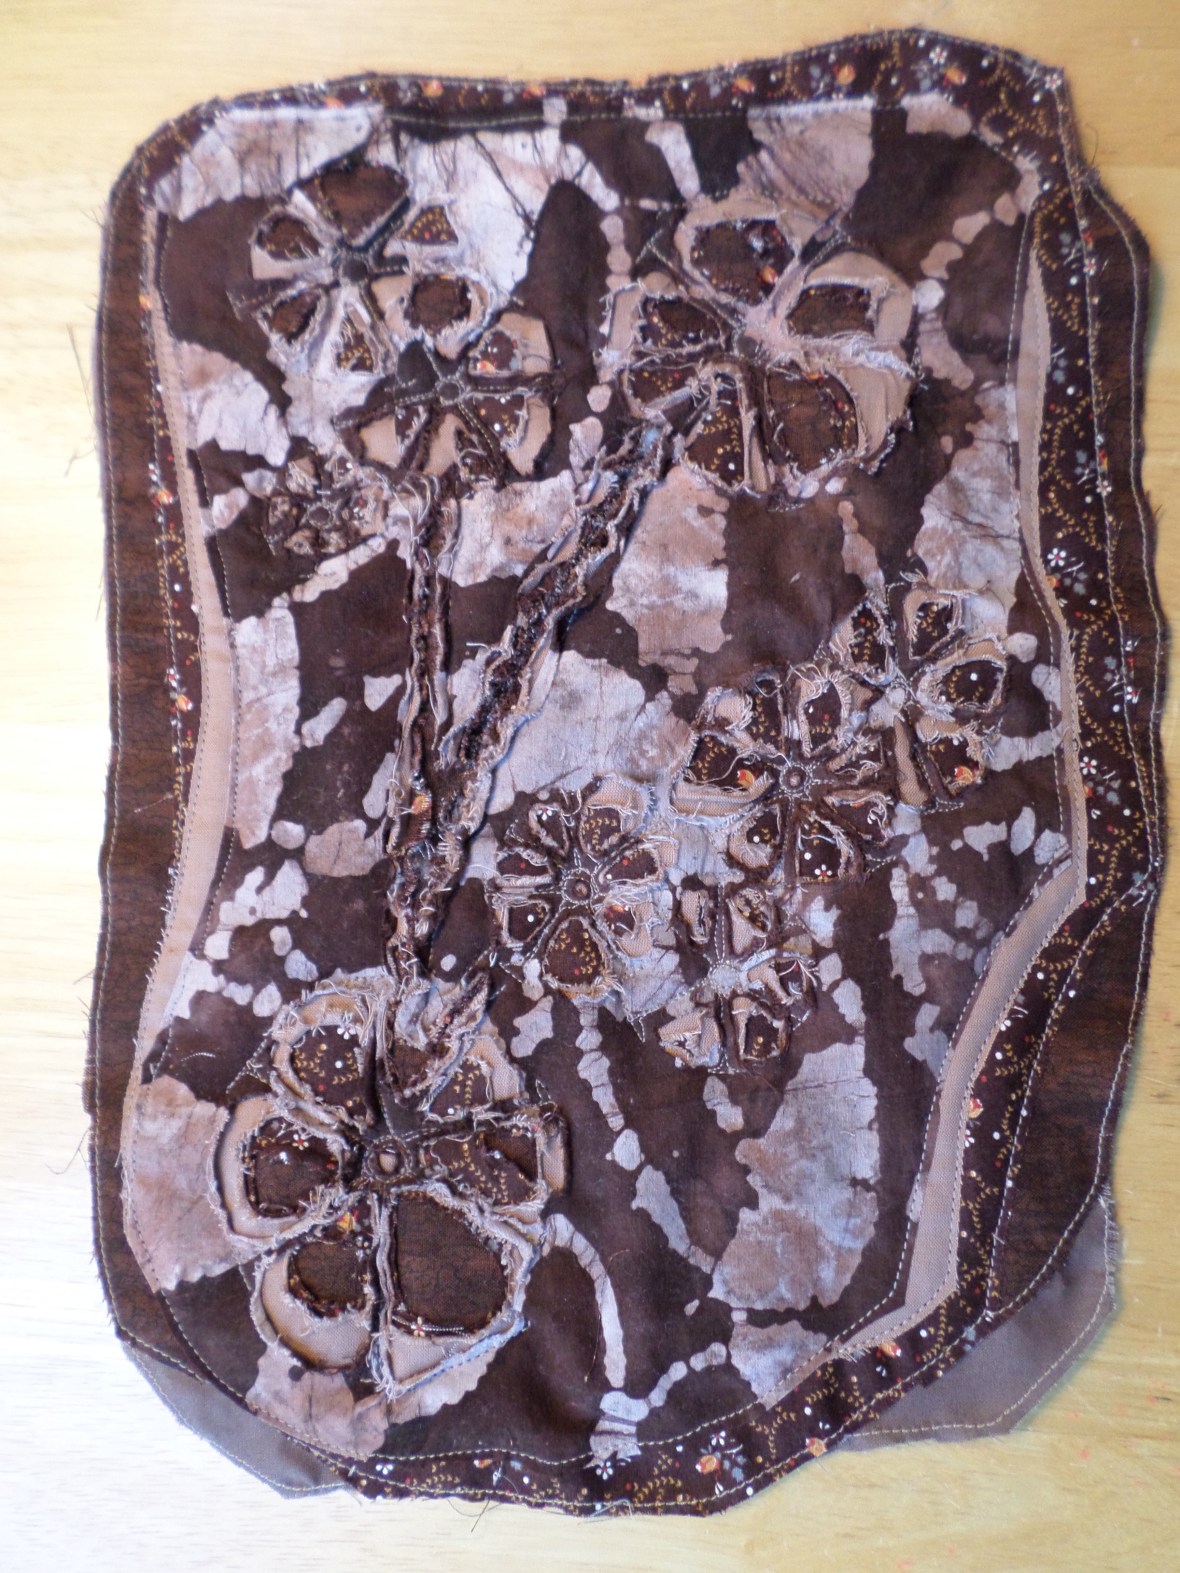
My next exploration was inspired from a photo* of an ancient plant that has leaves that are radial and flat, so the fossil looks like flowers.  I used the same methods as above, but used my batik as the surface layer.  It gives the piece a lot of movement and drama, but obscures the actual cut-away motifs.  Some fossils are difficult to discern, so I feel this has a valid place in my triptych, but it is harder to see the work I’ve done.

SAMSUNG CAMERA PICTURES

SAMSUNG CAMERA PICTURES

SAMSUNG CAMERA PICTURES

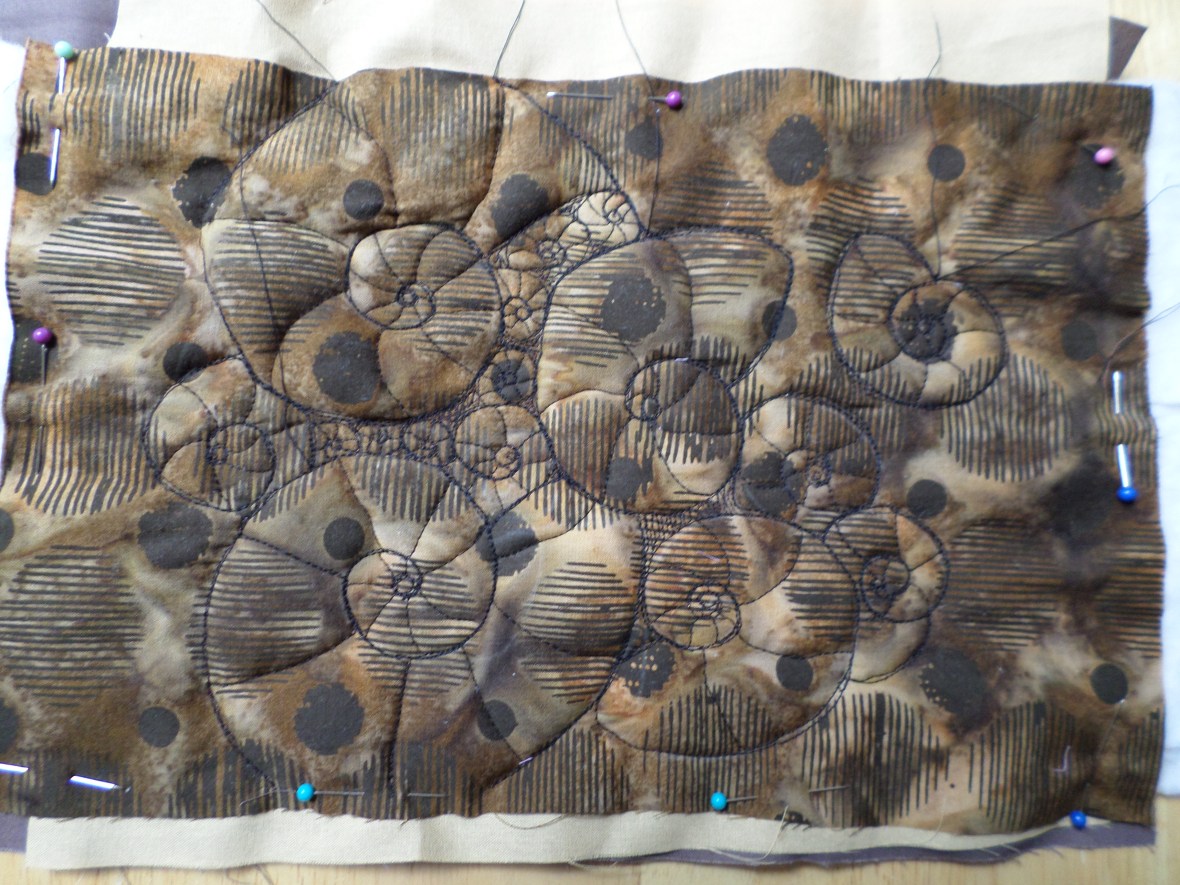
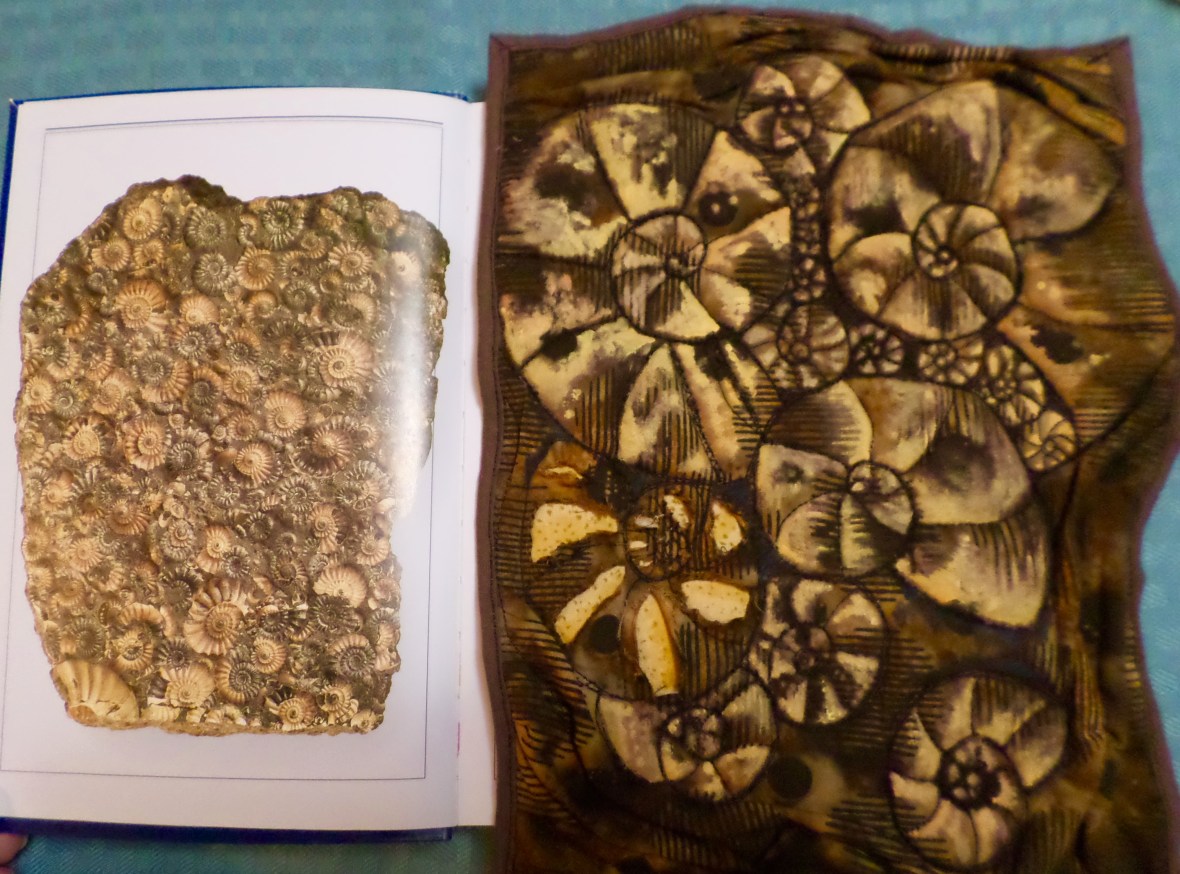
The final piece was of ammonite-styled shells, based on a photo from the Smithsonian Handbook of Fossils.  I loved the depth and textures in the photo of the shells, and wanted to add extra layers of batting to my creation to enhance that depth field.  In doing so, I did what’s known in many industries as “something stupid.” (no self-denigration here, just reporting the facts.)  Firstly, I only used three layers of fabric.  I placed a layer of batting between the bottom and middle layer.  Then I added shell-shaped cutouts of batting beneath a few of the shells between the top layer and middle layer.  After free-motion sewing the shells, the depth variances were lovely, but when I cut away the top layer on these thicker shells, the batting showed through.  So, I lived and learned and changed my methods.  I did cut one of the shells successfully.  But the others I simply fabric painted the surface to bring out some dimensionality, and to match the shell that was cut.  I like how this turned out, it just didn’t make good use of the layered cloth technique.

SAMSUNG CAMERA PICTURES

SAMSUNG CAMERA PICTURES

SAMSUNG CAMERA PICTURES

SAMSUNG CAMERA PICTURES SAMSUNG CAMERA PICTURES SAMSUNG CAMERA PICTURES

I plan on adhering these to a mat board and framing them.  I’m not sure yet if it will be a single frame, or the three separate.  But I am excited to have honored my Mazon Creek fossils!

*The photo of the floral style fossil is from page 91, “The Mazon Creek Fossil Flora” by Jack Wittry.


Excavating Inspiration

Mazon-Creek-Fossils

This image is from americanfossilhunt.com.

I propose that the artistic temperament is so because there is an almost overwhelming ability to find inspiration in the world.  It is hard for an Artist to look at things strictly as they are,  because there is always a depth, connection or revelation to be found in things.   At least that’s how I see the core of my creativity, that there is always more to express.  It’s fun to build inspirations upon each other, or to explore the form of something through a different form or to see how deconstructed and truly original you can make something.

My latest endeavor fuses inspiration I find in Mazon Creek fossils, with a wonderful sewing technique book called “Layered Cloth: The Art of Fabric Manipulation” by Ann Small.  She demonstrates how to layer several pieces of fabric, strategically sew patterns, then cut the layers away to various depths, to create lovely and tactile fabric art. I just love how textured the final piece can become, and how different sorts of fabric create these sensory landscapes that you have to touch to fully enjoy.

Mazon Creek is an area in Illinois that has produced copious fossils from an era of about 300 million years ago.  That area was once mined, and so towering piles of these concretions (the compacted sediment that contains the fossils) were brought to the surface.  The area is now protected, but formally led tours sometimes go in to collect fossils, and the concretions are sold online.  I bought a bag of these concretions and have been submitting them to the freeze/thaw method of getting them to pop open, and reveal the fossil.  As you can see in my collection below, I have mostly ferns, some ancient conifer needles, a flat seed and some possible enigmatic soft-bodied critters.

SAMSUNG CAMERA PICTURES

When they pop, I love knowing that I am the first human being to see these remains (presumably).  I love how the minerals in the sediment coalesce to enhance the forms of the fossils.  It’s all very inspiring!  So I decided to experiment with this layered fabric technique, and use fossil forms as my motifs.  I have made three so far, featuring a fern, spiraled shells and a sort of flowering-leafed plant.  My forthcoming post will show how I  created my Mazon Creek Layered Fabric Fossil Fern Quilt.  It’s a long title, but it’s worth it.  I will post it in a few days, as I need to finish my shell-themed quilt to include it.

SAMSUNG CAMERA PICTURES

The Vast In-Between

Some years ago I had seen a video that showed the relative distances from the largest known phenomena of the universe to the smallest.  It became a paradigm shift for me because of how much space and distance it showed that exists in the subatomic realm.  Despite our inability to physically see it, the inner space of our presumed forms is vast, and rife with potential.  I couldn’t find the video I saw, but here is one that is similar:

It is easier for the imagination to amplify its senses out into the galactic realm, mostly because it is observable, and seems to enlarge with every step.  But when we imagine into our forms, we think in terms of reaching the smallest spaces of ourselves, and that limitation is because of our point of perspective. Is it possible to reach within, and experience that vast, mostly unoccupied space that’s hidden within a form, commonly understood as being a subatomic space?

Lately, I’ve been taking walks into my subatomic self, as a sort of meditative daydream.  It has been an interesting exercise because I am doing my best to keep this out of my mind’s influence.  I don’t want to think my way through the walk or to think about what I will find.  I just want to take the walk, and have that experience.  I have discovered that parts of my body have specific climates (perhaps like the damp or fiery descriptions found in Chinese medicine), have inhabitants (with voices and emotions), are notably loud or silent (no digestive jokes, please), are clearly of the Earth or are galactic and in a few cases, are like a vortex that leads me someplace that I can’t even relate to being of my own body at all.  My walks are to explore the potentials residing in my form.

This started because I have reactivated a chronic foot issue that leaves me impaired and lame for weeks while it heals.  It’s an old story in my life, an old pattern in my body.  I’ve tended this in a million other ways; every time it presents I regard it with something different.  So this time, with total acquiescence, I decided to go subatomic and see if there’s a Choose Your Own Adventure here that could lead to some new endings.

Making choices in this inner space story isn’t what I thought it would be.  It isn’t about how the story branches into a plethora of endings.  Despite my expectations (i.e. my mind’s way of doing things) there is nothing linear about this.  It is all about going multidimensional, seeing how the story exists through many layers, feeling it out as you go.  Molecules may be too personal a structure for seeing the story objectively, so start with the atoms.  Does the cast of characters lie in the atom?  Is there a separate backstory with each electron or various quark?  Is the plot driven by bosons?  Each of these things is in a world of its own, yet they all add up to tell a tale that becomes the world I live in, to be the story that is told through me.  Every littlest bit adds depth, fleshes out the story.

As far as my foot goes, it starts with pebbles in my feet….it starts with forgetting to separate myself from the earth I walked upon….it starts with remembering I used to be pieces of the earth….it starts with “In the beginning……”

earthrise


Taxidermy Needle-Felted Dodo

Supplies:

  • styrofoam
  • floral wire
  • polymer clay
  • acrylic paints
  • ModPodge, matte or gloss finish
  • thick sheet of wool felt
  • wool roving
  • needle-felting needle
  • feathers
  • hot glue gun and glue sticks

Yes, that’s right.  We’re doing a dodo.  I have a “Natural History” display cabinet, and it has been needing a dodo.  I had been imagining simply sculpting one from the polymer clay, but I had concerns that it might be top heavy and keep tipping over.  I happened to see the video in my previous post , and happened to have a bag of feathers and a styrofoam disk, so I decided to create an armature and build my dodo as a taxidermy project.

The styrofoam disk is from the dollar store, and I cut it into thirds.  Then I paired two of the wedges, honed their shape a little more and created a couple of staples from the wire to hold it together.  Then I rolled the sharp edges on the table to round them out.  This became the body base of my bird.

The next to come was the base for the feet and beak.  I formed the wire into basic dodo foot shapes, and made sure I had prongs leading from the top of the feet so I could press them into the body base later.  Then I shaped a base for the face and beak, also including attachment prongs.  This was a great way to use an obnoxious orange clay I had from another project.  I overlaid the clay and detailed it to make a flashy pair of feet and a beak.  After baking the clay, I painted and clear-sealed it.

Now comes the taxidermy (in a very faux sense of the word).  I accidentally deleted a few of these photos, so I can’t show you the process of adding a styrofoam neck base to the body, or of cutting sections of the wool felt sheet, then hot gluing them onto the foam base. Unlike real taxidermy, I wasn’t concerned with mounting an entire pelt around the body base, so I was free to cut and align smaller sections of the felt.  Also, in deciding the arch and shape of the neck, I kept holding up the face piece to get an angle that I liked.  When applying the felt, I was careful to press it up against the face piece so I wouldn’t have to needle-felt any patches in that area later.

My photos for the finishing steps were also lost.  So please employ your imagination for this part.

I felted roving around the bird, to add color, smooth out my base felt patches as well as to fatten the body up.  I had to stab gently with the needle, and often at a severe angle because I couldn’t stab into the styrofoam base (it was too hard) and I did not want to break my needle.  So I was careful to only poke into the felt base (and that is why it helps to have a thicker sheet of felt to begin with – the one I used is carried at both Hobby Lobby and Michael’s.)

I experimented with a lot of things to make the wings.  I was out of polymer clay so I shaped thinner slivers of the styrofoam that I had left onto a wire, heavily painted them, and was easily able to poke a few layers of feathers into the foam.  I used an awl to make a guide hole through the felt layer of the body, then pressed the wings onto the body.  A few feathers became a tuft of tail, and my little display dodo was complete!

dodo

My dodo is now a cherished part of my Natural History cabinet, as well as a reminder to cherish and support the well-being of the many bird people who currently fill my life.

Evolving Into the Familiar

I will link a video at the end of this post.  It is about an artist who fuses animal pelts with human facial features.  I’m putting it at the end because if taxidermy/using animal skins makes you uncomfortable, you can avoid seeing the video.  It also may be uncomfortable seeing a human face in an animal context, (I find it both alarming and enthralling.)

In my last post, The Traveling Eye, part 2, I commented on retraining the eye out of habitual visual depths, in order to freshen both your awareness as well as creative vision.  (And possibly to benefit your physical vision.)  I watched this video recently and it has me thinking in a tangental direction.  Instead of having a perception filter that reduces what we see into something familiar, and therefore less apt for acute attention, what happens when we explore with a filter that details our own image/self onto what we see?  Does it become endearing, because we see ourselves in it?  Is it revered?  Or does it unsettle?  How much of ourselves are we willing to see, in the world around us?

A quick perusal of art, architecture and crafts shows how we love to see our image portrayed through and onto almost any medium.  And literature abounds with anthropomorphized fauna, flora and objects, to our delight and entertainment.  But when the human image, merged with other aspects of nature, gets a little too real, some discomfort arises.  The image becomes unnatural. And our reactions to that unnatural image are what I find exciting to explore. Who am I when I’m in the middle of an emotional reaction to a simple image?

It doesn’t even take a full-on human face applied to an animal form to summon that reactive revelation.  There are two books of primate photos I recommend, to evoke reaction.  One is “James and Other Apes” by James Mollison (its cover is the chimp photo below) and the other is “Monkey Portraits,” by Jill Greenberg.

I want to clarify, I am not advocating exposure to extreme types of things just to feel horror, or be grossed out (or actually, to feel anything).  Main stream culture and media have that covered all too well.  I am talking about reactions to things that are not so obvious.  For example, in the “James” book, when I pay attention to myself as I see its images, why would I feel such vulnerability, or fear, or awe, by a simple close-up view of a primate face?  Why would I be moved to tears?  Why would I want to give a particular ape a hug?  Apes are that gray space between the human image and an animal image, it’s an easy segue and easy to relate to.  But why would I be feeling what I feel when there’s more contrast in the paired images?

In time, I’ll continue my thoughts on this.  For now, here’s the video.  And, I accidentally deleted some photos that documented my steps in creating a Taxidermy Needle-Felted Dodo, but I’ll include what I have in the next post.

https://www.kateclark.com

The Traveling Eye, part 2

Winter has been long this year.  We’ve had it easy, no big blizzards or anything, but the arrival of Spring has been in slo-mo.  I keep thinking a vacation would be nice, but everyone else in the continental US seems to be having worse weather than here, so I’ve decided what I’m really looking for is a change of scene. There are a few tenets to the benefits of travel that get iterated often, precisely because they are so true.  One is that when you go to new places, you get to explore a new you.  Wherever you go, there you are, but who you are can depend a lot on your environs.

mood-orientale


The second is that it summons new creativity, because you see new places and meet new people and explore new things.  It’s impossible to not be inspired by all that novelty.

But there’s another great benefit, if not to travel exactly, then to placing yourself in different scenes.  And that’s to your eyesight.  I’ve become uncomfortably aware lately how routine my focus fields have become.  Entirely too much of my sight-time is devoted to viewing about 18 inches in front of me, staring into a computer screen.  I suspect that’s true for a lot of people.  The added challenge of this is that the concentrated glow of the LED screen reinforces the 2-dimensional nature of what I’m looking at, and does a lot to negate any artistic enjoyment out of what I’m seeing.

Also true for many people, is routinely seeing to about 3 cars length in front of you, while moving quickly.  That’s a detrimental vision habit too, artistically speaking, as it forces you to take only a surface read of what you’re seeing.  Swapping keen observation for safety is fine while driving, but when the habit carries into the rest of your day, you lose a lot of detail potential.

Even a regular walking route can build vision habits that lose more that you gain.  In my many years of walking to the el or bus stop to get anywhere when I lived in the city, it was so easy to zone out on those walks, especially if I was tired, that I often based what I saw on the assumption of what I should see, rather than what was there.  Many times I would pass a shop front and suddenly realize a new business was there, only to wonder when the heck did that happen?  Where was I, in the dozens of times I passed by and didn’t see a change?

I’m bringing some sight-changes into my life.  Here’s a simple exercise I did, from the comfort of my favorite recliner!  The living room wall of my apartment is all glass, with a giant patio door.  I look out all of the time to this lovely treeline.  But my habit is to flatten it into a single view, rather than really look into the whole depth of that space.  So I decided to use the clear acetate left over from my hanging orb project. I trimmed it into about 3″ squares, and then took the time to explore different depth fields of this patio view I am so accustomed to.  I made simple sketches with Sharpies on each acetate square, then layered them to complete the scene.

SAMSUNG CAMERA PICTURES SAMSUNG CAMERA PICTURES SAMSUNG CAMERA PICTURES

I want to continue this method as a style of sketchbook, because the materials travel well and the sketching I do is not complicated – I am not looking to create a photo-realistic final image.  The main thing, is my eyes feel better when I consciously explore these depths of field.  It is a refreshing way to take a journey, without having to travel far.

Here are my daily visitors, who merited a layer of my sketch.

SAMSUNG CAMERA PICTURES

Interlude – The Traveling Eye, part 1

“The eye is the first circle; the horizon which it forms is the second; and throughout nature this primary figure is repeated without end. ” Ralph Waldo Emerson, “Circles”

drawn-sphere-circle-line-20

This famous quote from Emerson has been a favorite since I first encountered it.  There is no mistake in seeing the wordplay between ‘eye’ and “I.”  With a few phrases, he launches us from the point of undifferentiated conscious awareness (the first circle, that which is capable of seeing, the I AM) into a tangible space dimension where the only limit is the perception of the next circle to be seen (the second circle, one horizon that leads to another and answers “Who am I?”) We all end up in this same orb, navigating our place in it, balancing the eye of perception with the identities of the world created in it.

This Interlude began with the simple question “What do I want to see more of in my world?”  After considering a long list of predictable divine auspices, global graces and social improvements,  I found one I knew I could achieve in a day.  I am wanting to see more hanging orbs in my environs.  (A glib segue, perhaps.  But in the nature of this universe, one circle leads to another.)  A friend made me two origami orbs that I have hanging from my ceiling, and I have wanted to expand that universe.  So I perused the internet for paper orb tutorials and discovered this beautiful site and project.  It is absolutely perfect for the scrapbooking paper I have wanted to use, and in a nod to Emerson’s Transparent Eye, I decided to try this project with clear plastic and make something like a non-glass, lighter-weight hanging terrarium.  I found the perfect weight of plastic craft sheet at Hobby Lobby, in with the racks of watercolor papers.  Also, I printed the project template at home, then went to the library and enlarged it at 4 different settings so we could make different sizes of orbs.

SAMSUNG CAMERA PICTURES

Our resources – we didn’t get around to using the craft or watercolor paper this time.  Be sure to have both matte and gloss tape unhand to suit your materials.

Fran is back!  She wholeheartedly accepted the invite to paper craft, so we got to work.  Our orbs turned out impeccably, despite a false start.  If you reference the project link above, you’ll see in the template that you start by cutting a strip of paper (or plastic), and then you need to score/emboss four arcs onto it.  When we cut our template strips, we cut out the arcs so tracing the score pattern would be easy.  However, when Fran realized she’d cut out the arcs as well as the paper strips, I suddenly looked at what I was doing only to discover that I was in the middle of doing the same thing on my plastic strips.  So we began again, with the mantra “OM PADME ONLY CUT OUT STRIPS HOM.”

Our misstep above, from tracing the whole template onto our materials.  Also, I used a thin Sharpie to trace onto my plastic, but it does not wipe off.  I was careful to trim those dark lines when I cut my strips, and I also did not draw the arced areas onto the plastic on my second attempt.

SAMSUNG CAMERA PICTURES

Unfortunately, most of my photos from this turned out blurry, but this one sums up our success fairly well.  Fran said the scrapbooking paper was just the right weight for this project.  I enjoyed using the plastic as well, although there was one more misstep involved.  I got my three strips of plastic looped and interlaced, only to realize there was no good access point for putting something into the middle space of the orb.  In making the second clear orb, I found you need to put your inner items in when just two of the loops are laced, then you carefully add the third strip.  I had to use tweezers through a narrow gap between sections to tweak things before I compressed the scored sections to complete the orb shape.  More practice will definitely benefit the quality of the inner scene I create in the orb.

SAMSUNG CAMERA PICTURES

And, I tried the wire mesh – to no success.  It was too fluid and kept pulling out of shape when I needed to shift it around.  If I ever encounter a better-suited mesh, I will try again.

When the weather gets nicer, I plan to spray paint my first clear orb a metallic finish.

sam_05941-e1522976754983.jpgSAMSUNG CAMERA PICTURES

Fabric-Sheathed Clothesline Rug

Supplies:

  • fabric jelly roll
  • thread
  • no-skid backing the size of your rug
  • durable (thicker, like canvas) base fabric, size of rug
  • durable fabric (same or different from base fabric) enough to have strips that bind the edges of the rug
  • pins
  • cotton clothesline
  • sewing machine with a zipper foot


The size of my rug was determined by the size of no-skid backing I happened to have on-hand. The finished size of my example is about 28 inches wide by 18 inches high.

SAMSUNG CAMERA PICTURES

I unrolled and arrayed the fabric strips to decide what order I wanted them in.  Then I cut lengths of clothesline that were slightly longer than the length of rug; 2 lengths of clothesline were used per row that you sew (this equals about 3/8 inch width). So that means 4 lengths of clothesline were used per fabric strip.

AN IMPORTANT NOTE: My photos show that I laid the clothesline short of the edges.  PLEASE IGNORE THAT, and let your clothesline extend just past the edges.  I originally tried to create a 1/2 inch seam allowance on all sides, and for a variety of reasons, abandoned that idea.

First sew a strip, right side up, along the length edge of the base fabric, with a 1/2 inch seam allowance.  Now align two cords of clothesline, side-by-side, between strip and base fabric, pin tightly.

SAMSUNG CAMERA PICTURES IMG_0617

Using a zipper foot, press side of cords against the foot and sew.

SAMSUNG CAMERA PICTURES
first sewn row of rug, fabric should be fairly tight over cording

Align the next two cords, pin the fabric tightly over them, then sew.  Jelly roll strips are 2.5 inches, so you get two rows of cordings per strip. It is possible to get three rows of cording per strip, but that would leave only slight seam allowances on each side of the fabric strip, and I think the rug would wear out faster.

SAMSUNG CAMERA PICTURES
two rows of cording, one strip of fabric

Lay the next strip of fabric, face down, so that you have a 1/2 inch seam allowance from the row you just sewed.  Attach to the base fabric – you are basically sewing over the last row you sewed. I placed a pin at the start of the row, then used my finger to make sure the new strip of fabric stayed straight as I sewed it.  It is IMPORTANT that as you sew each strip/row that it butts up against the previous row, you want almost compressed rows.

Align the next two cords, pin fabric tightly over them, then sew.  Continue doing this until you have filled the width of your rug, being sure there is a 1/2 inch seam allowance remaining on the base fabric.

SAMSUNG CAMERA PICTURES
I did 4 rows per fabric design (so 2 strips of each design used)

With the bottom of the rug facing up, lay the no-skid layer down, and pin the edges. Trim the cording and fabric along the raw edges so they are even with the base fabric edge and straight.

SAMSUNG CAMERA PICTURES

SAMSUNG CAMERA PICTURES

Prepare your binding, a 2.5 inch strip long enough to cover all four edges of the rug. I used the remainder of what I used as my base fabric (a seafoam colored chenille woven fabric) and I had to seam my strip together a few times because the pieces of fabric I had left were short.  Pin the binding along a length edge, starting in corner.  Work around with pinning the binding so ends meet at original corner.

SAMSUNG CAMERA PICTURES
pins run through the binding strip, no-skid layer, and base fabric


With the rug face up, sew binding on with a 1/2 seam allowance all around.  Be sure to use a needle that can handle the thickness of the cording on the short ends – sew slower to ensure this.

SAMSUNG CAMERA PICTURES

SAMSUNG CAMERA PICTURES
sewn edges, bottom corner binding edges left apart

Fold the binding over to the front of the rug, turn it under so the top binding is about 1/2 inch wide and pin all around.  Miter the corners by using folds and extra pins to hold corner in place.

SAMSUNG CAMERA PICTURES

SAMSUNG CAMERA PICTURES

At the starting/final corner, trim binding even to one edge of the rug, then fold the other end of binding to secure the cut edge, and fold to bottom of rug.  Sew all around (I used a blanket stitch), again, going a little slower as you sew through the thicker cut-cording ends of the rug. Securely machine sew this starting/final corner, and then tamp down any missed edges with hand sewing for extra security.

SAMSUNG CAMERA PICTURES

SAMSUNG CAMERA PICTURES

SAMSUNG CAMERA PICTURES
I used a blanket stitch to better secure the binding

Tie off and secure and final threads, and then you’re done!  Because the space between each row forms a little ditch, I recommend using this rug in the bathroom or kitchen, since dirt from shoes will easily get trapped in those ditches.

sam_0456.jpg
Now I can wash dishes in comfort.

Time and Again, But Wait, No

12

I’ve tripped into another rabbit hole and this one is really sticking with me.  I heard a reference to the “Mandela Effect”, and so went to youtube to investigate.  I found oodles of videos explaining it, and giving examples of it.  The Effect is basically that there are large groups of people who have specific memories about things (historical events, spellings, quotes, logos) that evidently, never were true.  It is considered to be about timelines that are actively altering, and is often blamed on what CERN has been up to.

I have no idea where the truth lies (a favorite oxymoron, and learn its grammar here ) but I do know I got sucked into the potentials.  I remember Jiffy peanut butter, it was “Luke, I am your father,” I know it was Dr. Bragg’s apple cider vinegar, and there is no way Jean-Luc Picard fiddled with some random decor crystal in over 70 episodes of Star Trek: TNG.  I loved Jean-Luc and crystals too much at the time to have overlooked something like that.

All of this has got my brain scrambled.  Which isn’t such a bad thing, since creativity benefits from out-of-the-brain* thinking.  So how am I unwinding from all of this? How can I straighten out these tangled time threads? How can I ground out all this instability and chaos?  Well, I can make a rug.  I could use a rug.  I’m going to just get really anchored in my Now moment, and make a rug.

I’ve had some fabric jelly rolls I’ve been meaning to use (at least in my current supposition about my past, I have them, and have meant to use them.) I decided to also use some of that wonderful cotton clothesline that is left from my other recent projects (see my Projects page).  Touring the internet for ‘clothesline jelly roll rugs” I found two concepts that appealed to me.  One incorporated no-skid backing and had a woven look to it, the other had a classic rag-rug look that I like.  I opted to design my own rug, and answer my own questions.

Starting with the wonderful, eternal  spiral of a fabric jelly roll,  I’m going to unwind it, straighten out the strips and align them all in a nice, finite way that my mind can comprehend, and my feet can stand upon.  I will have a lovely center point from which I can let go of my attachment to the past and go-with-the-flow to enjoy my future.  This launch into researching the Mandela Effect may have me trippin’ but my new no-skid backed rug won’t.

SAMSUNG CAMERA PICTURES

* Thank you Mandela Effect. For those of you who remember “out-of-the-box” thinking, that only applies to Schrödinger’s cat now. Cats in general, actually. **

Do you remember the Great Box Shortage of 2018?

4876cd9188e14cfaa7dc16db531a5297--crazy-cat-lady-crazy-cats


** Ok, I just made that up.

Instructions for Fabric-Sheathed Clothesline Rug, on the way…really, in all timelines, on the way.

Interlude – Essential Truths, and Needle-Felting

The evolution continues.  In a two-part previous post I used the word ‘truth’ to reference that core perception that an Artist uses, around which she builds her expressions (i.e. art,  and the messages contained therein.)  Well, with this latest Interlude, I got to explore the difference between what we would see as the truth of a thing, and what we would see as it’s essence.  It’s subtle, (and could easily be merely a point of semantics), but telling in how we lead a viewer into perceiving our creations.

This was a group Interlude, with my friends Pam and Daniele, and Daniele’s daughters, Marion and Emilie. Daniele had seen a book about needle-felting dogs, and since both she and Pam are loving dog moms, we made this our project.  None of us had any experience with needle-felting 3D figures, and I’ve had minimal tries at felting onto a surface, so this was sure to be interesting.  Going into this, I kept thinking of that old tale of the blind men and the elephant, each man touching a different part of the elephant and therefore having a totally different description of what an elephant is.  I knew we each were going to approach this with our own abilities, our own perspectives, and quite possibly have a taste of the blind leading the blind.  It was all that and more (!), and we thrived in our goal to have fun.

SAMSUNG CAMERA PICTURES

We started with two books about needle-felting, Fleece Dog and Little Felted Dogs, and plenty of supplies: wool roving, felting needles, foam bases and shaping wires.  We also had reference photos of their dogs, Pam’s two current dogs and Daniele’s current dog as well as her former one. Pam and I worked on replicating her dogs, and Daniele and Marion worked on hers and Emilie played at being Prometheus and created a wool-person from scratch.  We were focused, and fruitful.  Here are a few highlights to our learning curves:

  • Despite the small gestures involved in needle-felting, it can be surprisingly impaling to the fingertips when you try to hold your sculpture up to work on it, rather than set it on the foam base.  Fortunately, wool is absorbent, and truthfully, we did quite well at being wound-free.
  • Felting needles break easily, 3 of our 6 needles met their maker by the end of the day.
  • Felting up a big wad of wool goes surprisingly quickly, and is remarkably satisfying to see it go from blob to dog shape.  But long skinny bits, like legs and tails, not so easy, not so fun.  We learned the fibers can’t all be in one direction, you need crosshairs to make the skinny bits hold their form.
  • This was my favorite learning curve; despite all of us being book people and library people, and being prepared by having instruction books on-hand, somehow it didn’t actually occur to us to open up the books we had until we were done with our creations.  Which goes to show, sometimes you go with the book learnin’ and sometimes you just dive in and have the experience you’re going to have.

Back to Essence.  If we wanted to create a truthful dog image, we would have aimed for photo-realism (just look on etsy and you will see amazingly real-looking dog and animal wool sculptures.) But our skill set at this point wasn’t there.  So as we worked, we had to keep making choices as to what level of truth would be told.  Were we aiming for personalities of the dog, for breed, for postures of the dog, or for general coloring and shape?  It quickly became a matter of finding and sharing the Essence of the dog.  As Creators, could we each look into what we made and recognize the dog we know?  Is its heart in the right place?  Are the legs in the right place? And for our viewers, will they be able to look upon our creations and know to whom, or at least to what, we lovingly refer?  Truth and Essence are a bit of a negotiation between what we want to share and what we are capable of sharing.  As well as what we want to perceive and what we are capable of perceiving.

Daniele’s dear dog perhaps made the greatest leaps in evolution, from essentially being a banana, to being a seal, to a quadruped mammal, to a bear, to a fox, to a dog, and finally, to being her dog.  It was a beautiful transformation, from the unknown into the known, and eventually into the beloved.  (And from end to end, because at one point she decided that what she was working on as the head, would make a better tail, so the whole little guy flipped ends.)

20180304_175204

SAMSUNG CAMERA PICTURES
Marion and Daniele’s pooches

Pam’s little darlings are actually larger-sized dogs.  We didn’t start with a wire armature for these.  They both were in a sitting position, which worked well for us as we soon discovered how hard it was to densify the felted wool for the legs.  The dogs really started to become themselves once we added ears and coloring.  Pam’s big challenge was the black-on-black of her labrador, so she wisely chose to offset the eyes with a lighter color, and gave him a kicky collar! And look at that happy-to-see-us tail!

2013-11-05 11.43.42

SAMSUNG CAMERA PICTURES
Pam’s dogs became ornaments!

Marion mastered her pup (see the smaller dog alongside Daniele’s in the photos above) and so created another fellow, a guinea pig!  And, as adorable as the real thing.

Yea! We used community to have some fun and see ourselves as Artists and Creators.   And now we know, we have talents that only ever ask to be expanded and explored, we have innate wills to create and a whole world to fill with our creations, and we have the power to imbue our joys in life into a million little things that will keep reflecting that joy back to us.  We Are….Success!

All of that, from a willingness to see something heartfelt in a few locks of wool.