
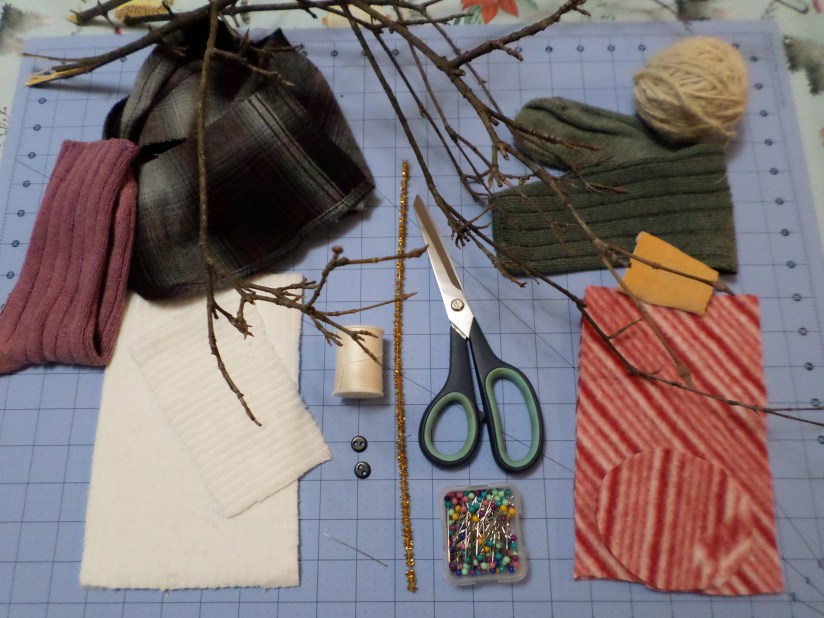
Supplies: (G&S) means Gnome & Snowman
- 2 pieces of fleece or thicker material, about 8″ X 5″, for use as body (G&S)
- 1 piece of same fleece or thicker material, oval about 5″ X 3″ at extreme points (G&S)
- poly fiberfill stuffing for body (G&S)
- a thicker weight thread (like upholstery thread) that fairly matches body material (G&S)
- medium-sized sewing needle, with eye big enough for thread
- scrap fabrics for making hats, scarves, belts (G&S)
- 1 piece of stretchy ‘nose colored’ fabric, 2″ square (G)
- yarn or twine for making Gnome beards
- sundry buttons, flowers, natural ephemera, ribbon for decorative details
- twigs if you want twig arms for Snowman
- scissors
- hot glue gun & glue sticks
- a sewing machine is handy for making the hats, but not essential.
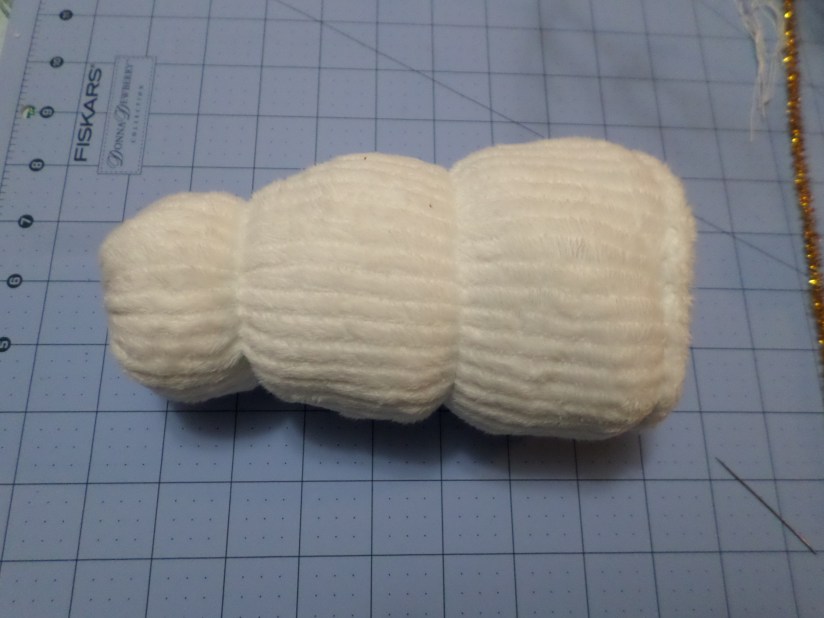
Cut the two 8″ X 5″ body pieces to slightly taper towards the top (so bottom remains 5″ wide and top has about an inch taken from each side. Start the tapering angle about 2 inches up from the bottom (so the bottom 2 inches of these pieces remain 5 inches wide.)
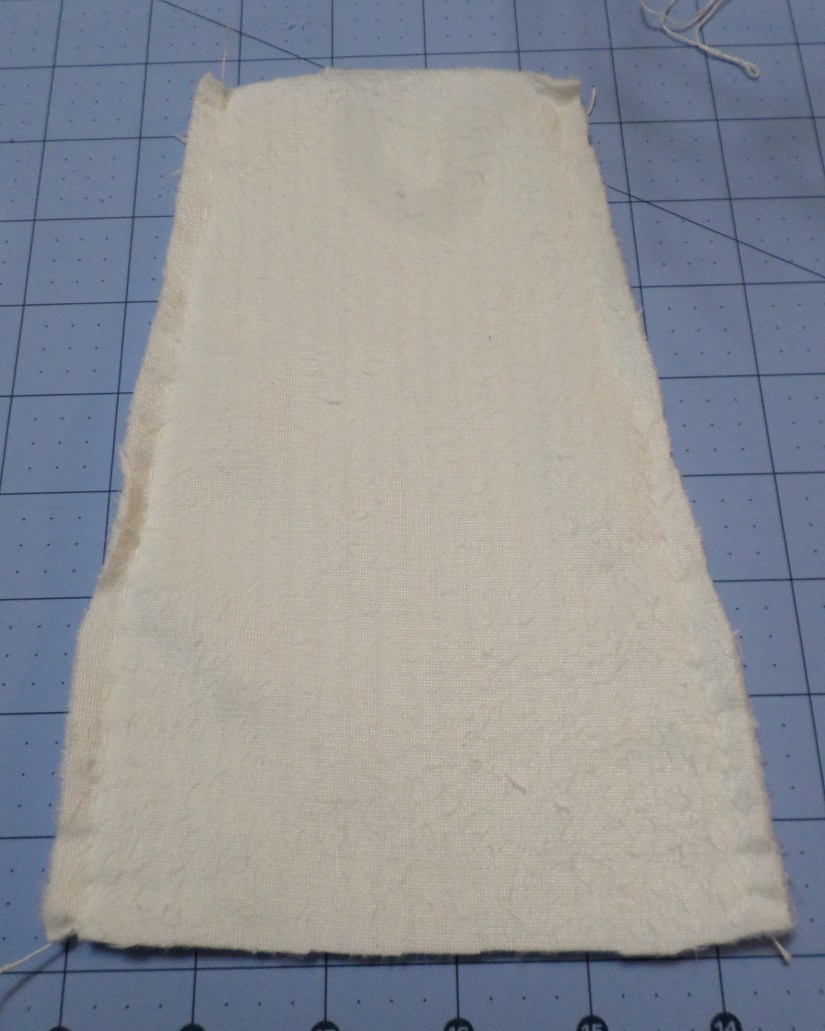
With the right sides of the fabric together, baste along the sides with short stitches, 1/4″ from the side edges and back stitch a stitch every few inches along the way. Top and bottom edges leave unsewn. Give a gentle tug at the corners to be sure the basting does not pucker the edge. Tie-off the thread.
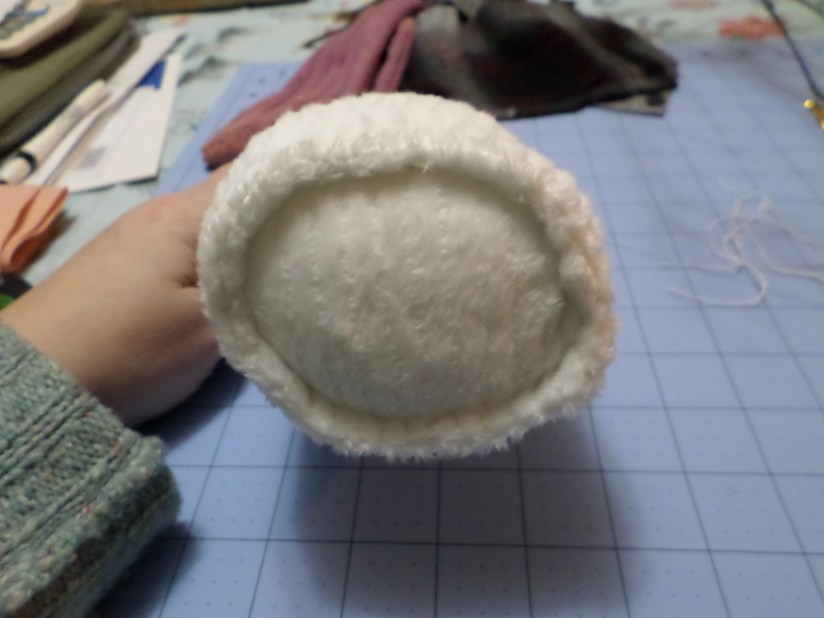
Pin the oval piece to the bottom of the body pieces, right sides of the fabric facing together. You may need to trim the oval to better fit the circumference of the body (you want the base to be flat when the little guy is stuffed, so do not let the base bulge too much.) Baste the oval base to the sides, back stitch a stitch every inch or so, and give a slight tug before you tie off the thread so there is no puckering. Turn body inside out.


Sew an extra ring around the base, about 1/4″ inch from the oval base seam, that pinches together the base and the sides. This creates a more stable base. Now stuff the body.
For the Snowman, use white thread and tie around the body, dividing it into three sections. (it may be easier to lay it flat, and tie it like a pork loin.) With each tier, knot the thread and hide the ends.
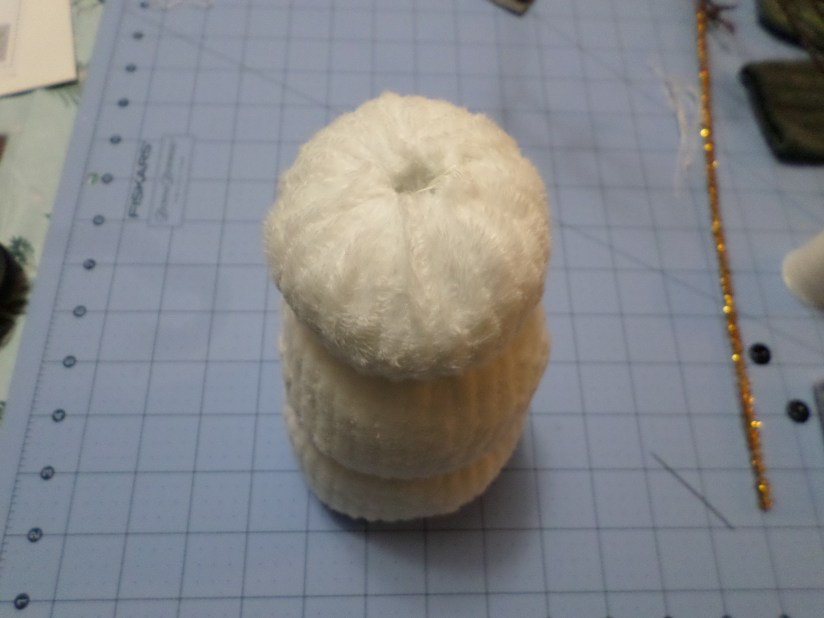
For Both, make a few stitches to close the top of the head. Be sure your fellow is stuffed fairly densely before you close the top. It doesn’t have to be neat because hats will hide this area.
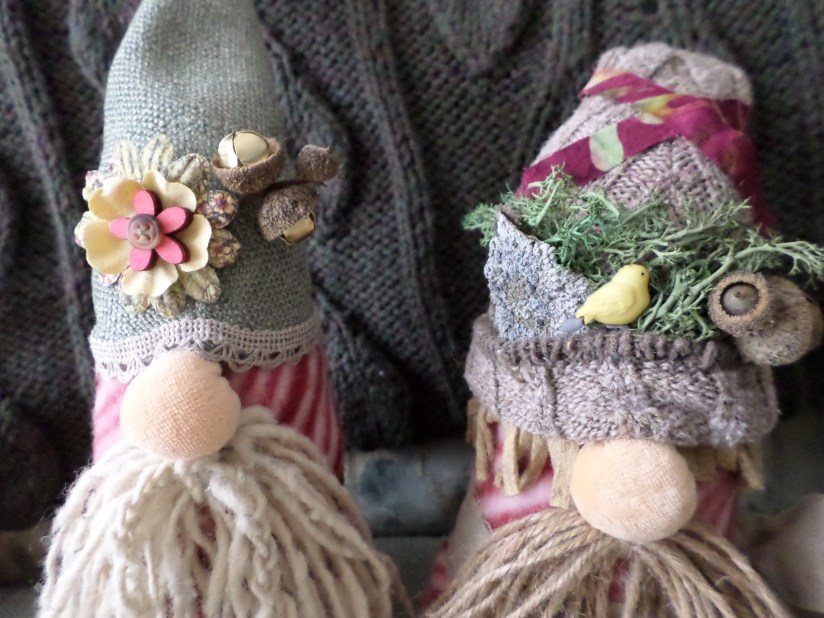
Hats: two styles. For the Gnomes, I used both old socks as well as made some out of upholstery fabric scraps. I machine sewed sections of the old socks, and the cut-out fabric hats.
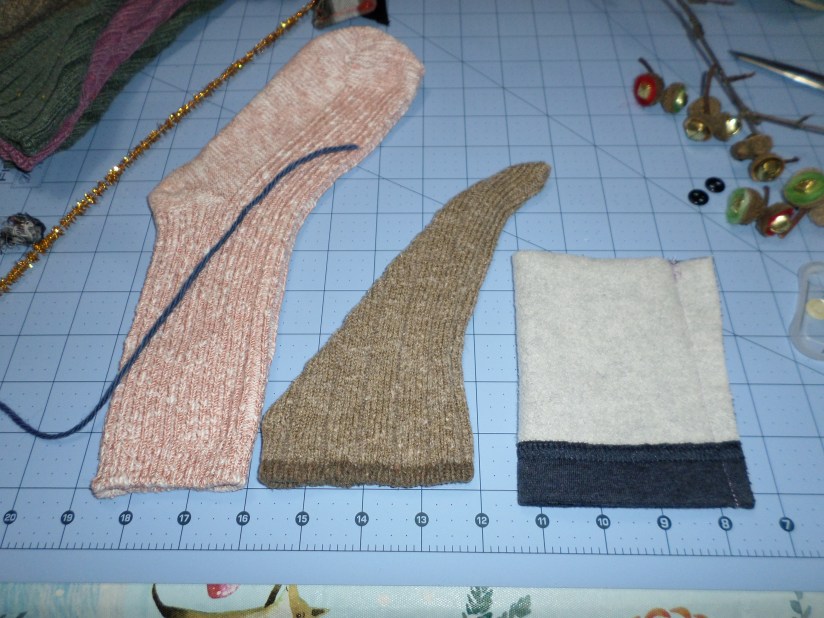
For the Snowman, I used the cut-off bottoms from athletic sweatpants. I machine sewed them to fit the circumference of the snowman head, basted then cinched about an inch from the top, then sewed down the top so the fuzzy sweatpants lining would look like a pompom hat top. I added adornments, then hot glued the hat to the head.
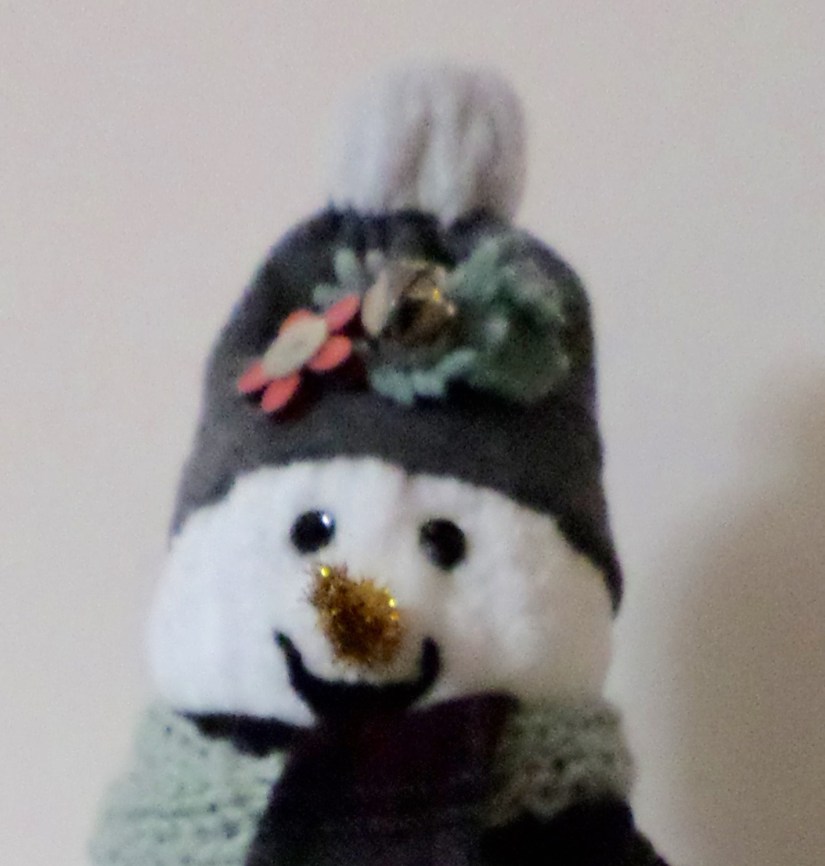
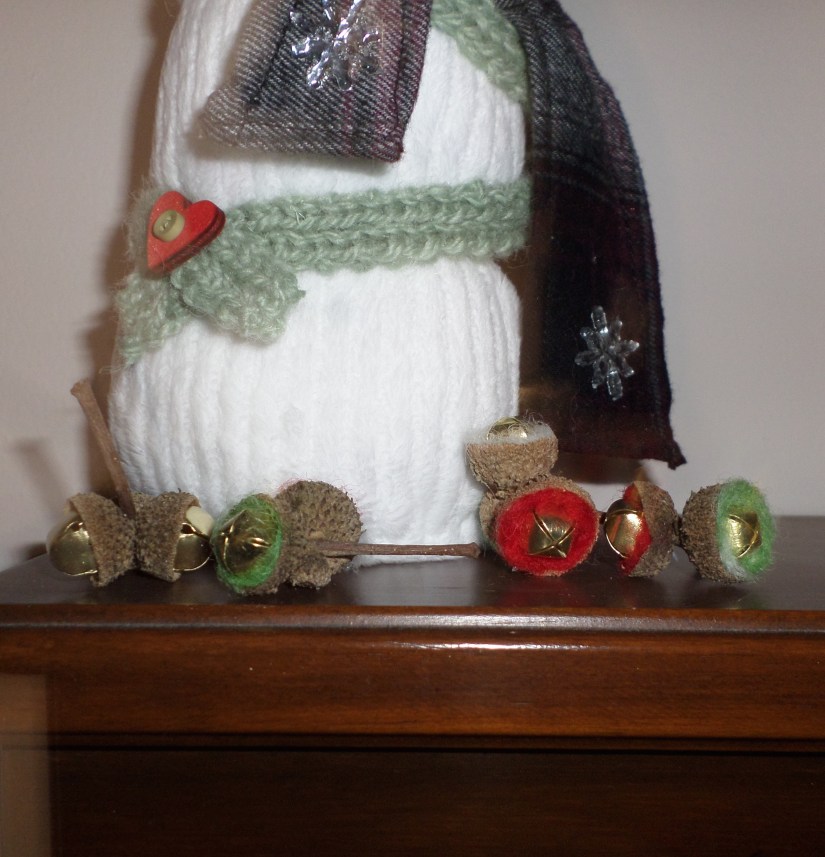
Complete the Snowman by adding the button eyes (sew or glue), adding a small curve of felt for the mouth, and tie on strips of fabric (I used flannel) for a scarf. I also wrapped a long bit of knitting I made, as a color accent and extra decoration, and tacked that down with a button. For the nose, wrap a short length of pipe cleaner around the tip of a sharpened pencil, then glue it onto the face.
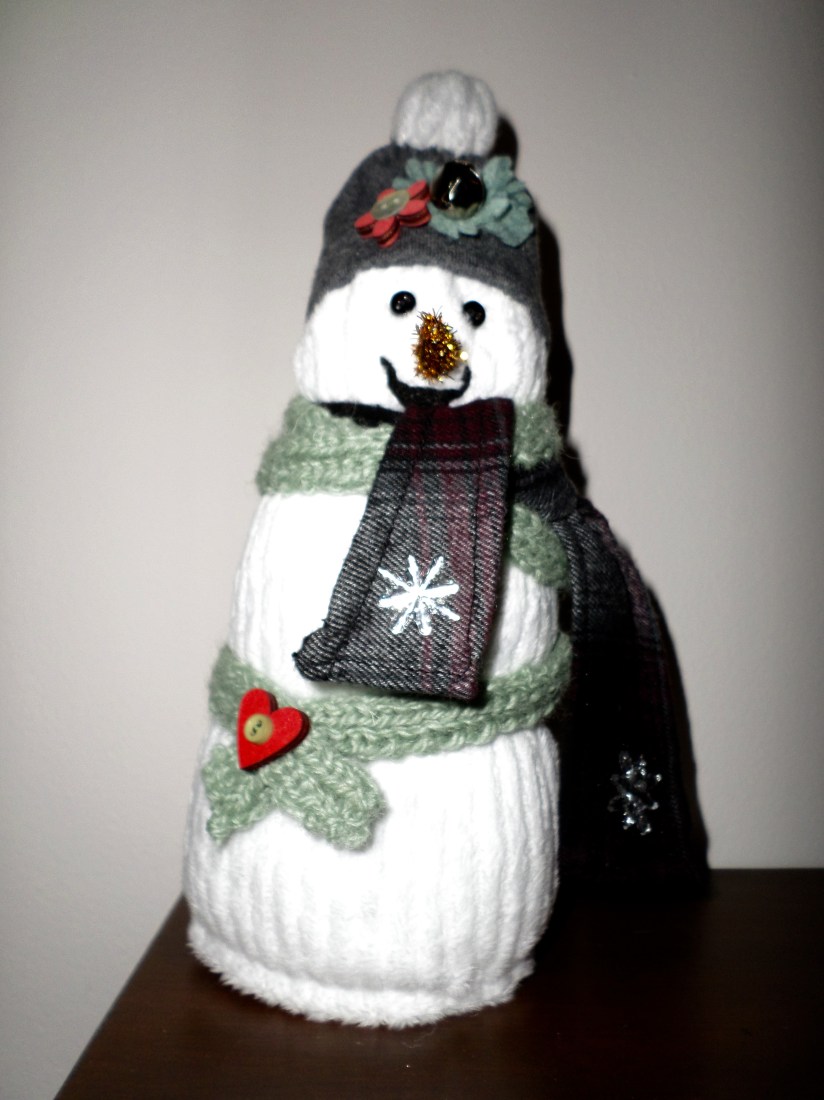
Your Snowman is done. An extra bit – I glued bits of wool roving and a small jingle bell into acorn tops, a lovely accent.
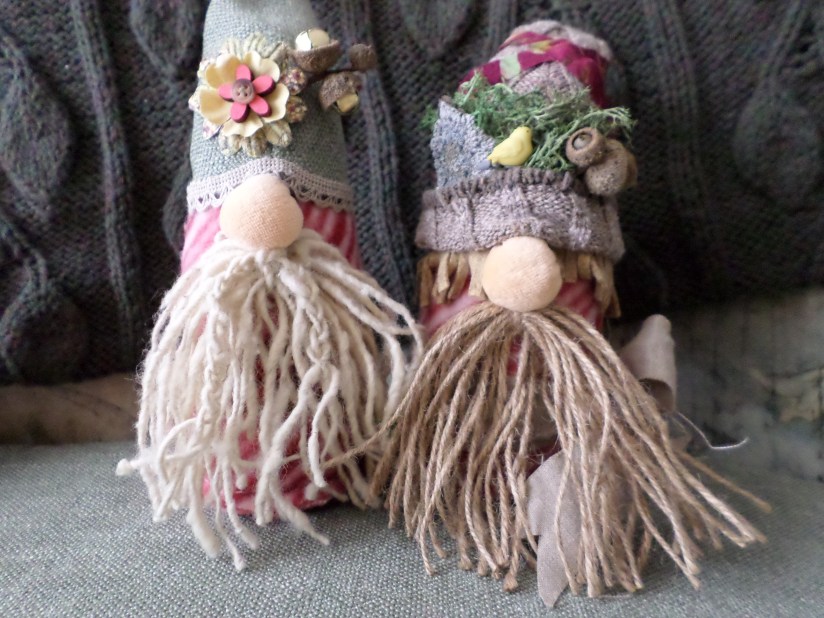
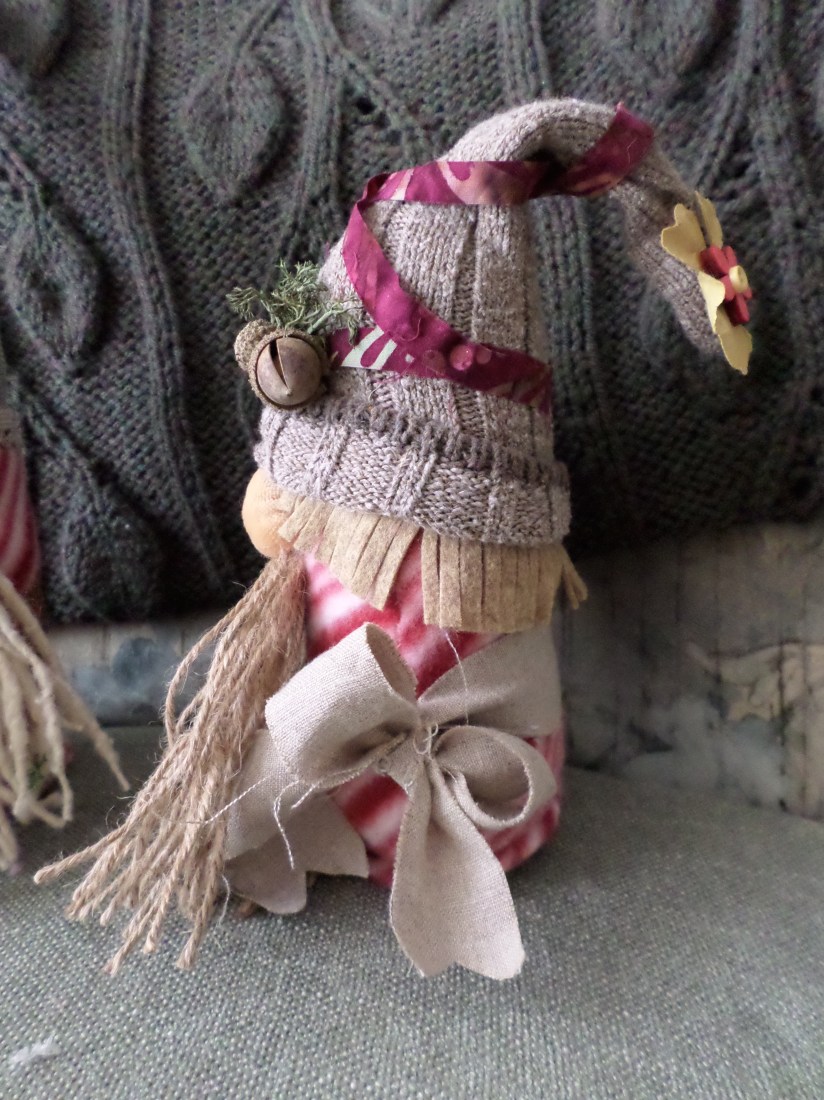
To complete your Gnome, once the base is settled, the body is stuffed and the head is sewn shut, adorn your hat and glue it to the body. The hats have some natural contour, but you can stuff them to encourage them to stand up more or curve in a preferred way. Before you add the nose and beard, you can add trim around the had and body, just glue it secure.
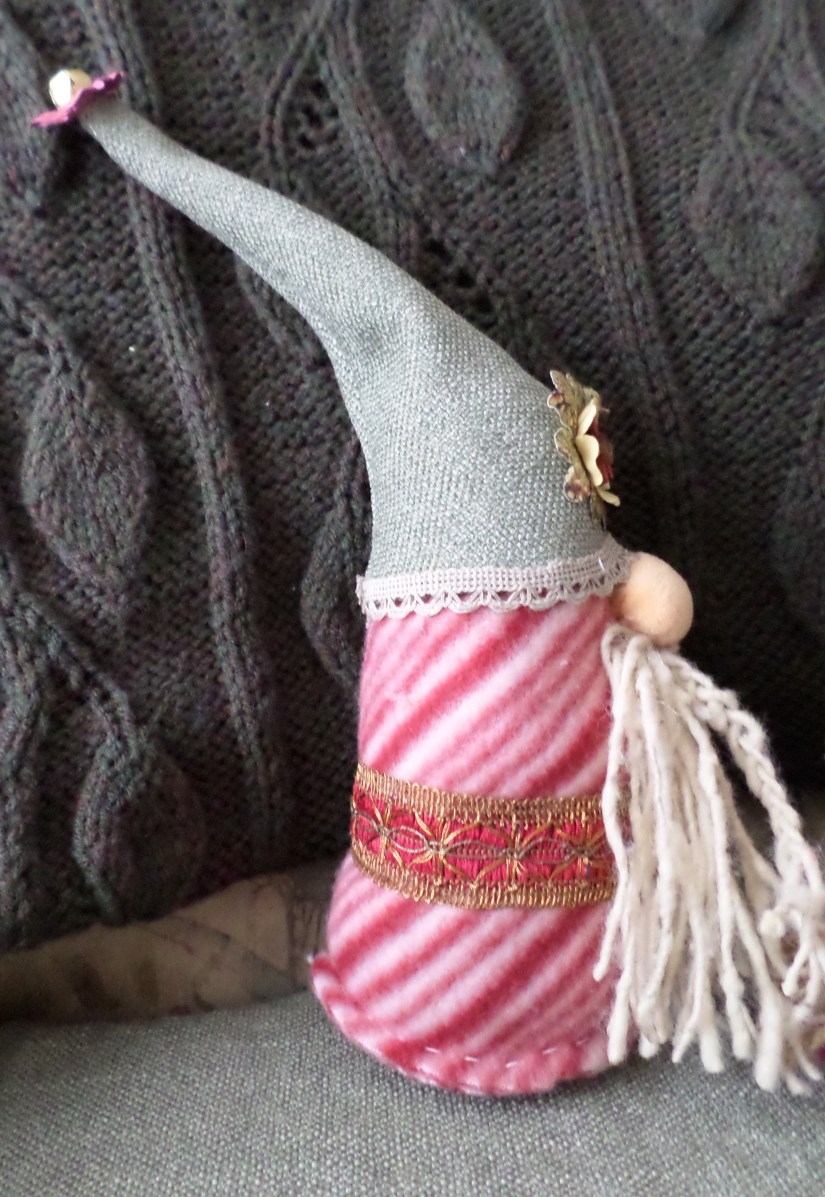
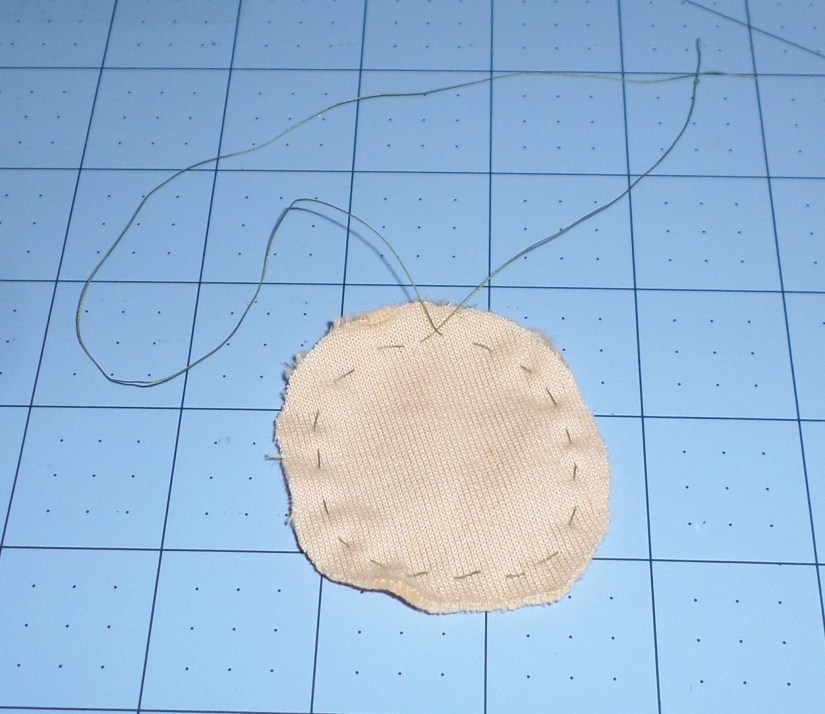
Make the nose by cutting the 2″ square of fabric into a circle, then baste around the circle, leaving the thread ends long enough to pull. Pull the thread ends enough to cause the circle to curve and pucker. Now stuff a dense wad of batting/fiberfill into the nose, and pull the thread ends to tightly close up the fabric edges around the filler. Securely knot the thread so the nose stays ‘closed’ and then sew the nose onto the Gnome body so it looks like it is peeking out from beneath the hat.
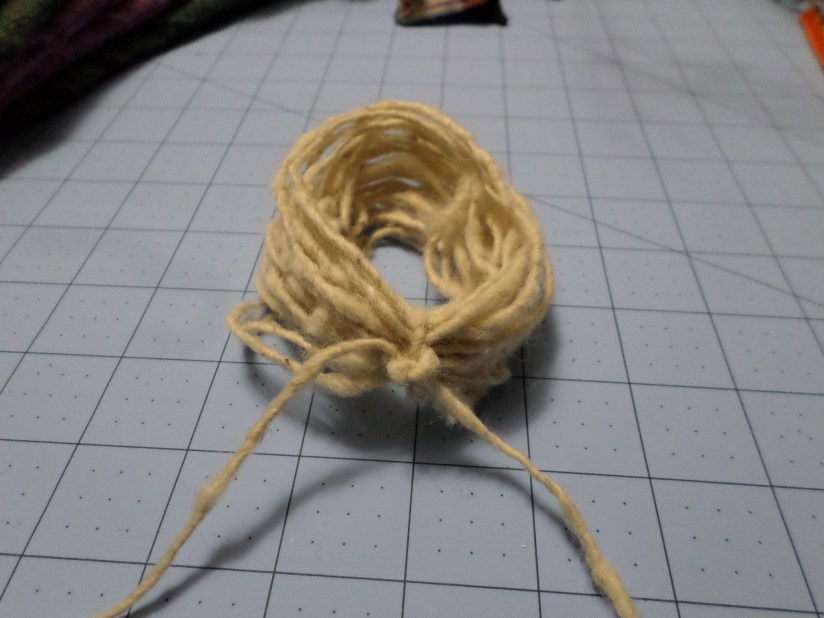
For the beard, simply wrap your yarn or twine around your fingers several times, so you have as abundant of a beard as you like. Tie it with a secure knot at the top, then cut at the bottom.
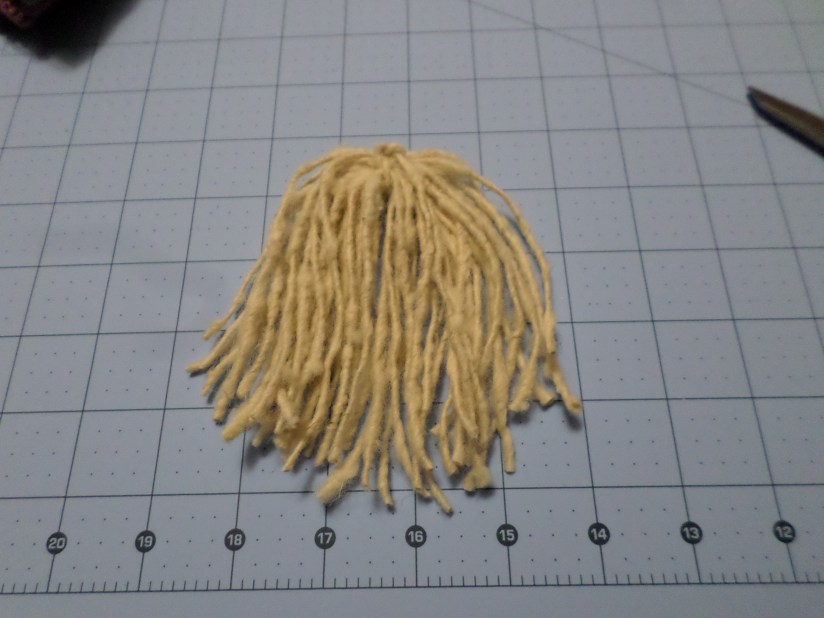
Glue the beard to just under the nose, and possibly make a light row of glue across the belly to help the beard lay evenly across. You can fluff up, braid or tuck in adornments to the beard. Trim the bottom to your taste.


Very cute!
LikeLike